Pricing
Go to app
User Name
Upgrade Help Center

WHMCS: placing LiveChat on your site

Jacob Firuta
2 min read
updated: Sep 20, 2022

Place a live chat function on your WHMCS page in a few minutes and start chatting with clients.

Using this integration, you can:

InstallationLink icon

Follow these steps to set up LiveChat on your site:

  1. Log in to your WHMCS admin panel.
  2. Download the LiveChat addon module and place it in the /modules/addons directory.
  3. Access the Addon Modules section from the drop-down Setup menu.
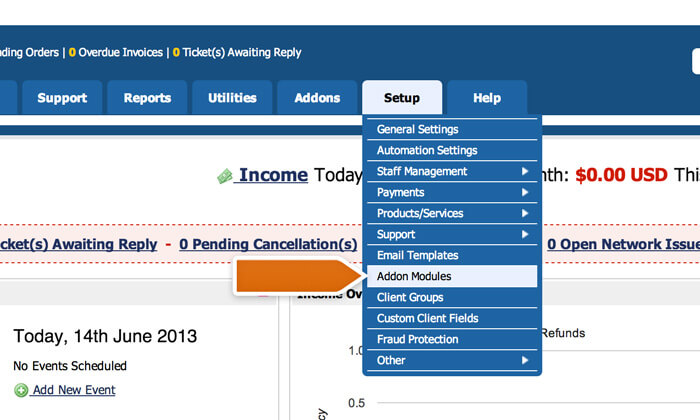
Accessing the Addon modules section

  1. Find the LiveChat addon on the list and Activate it.

Activating LiveChat addon

  1. Next, go to to the LiveChat code section to get your license number.
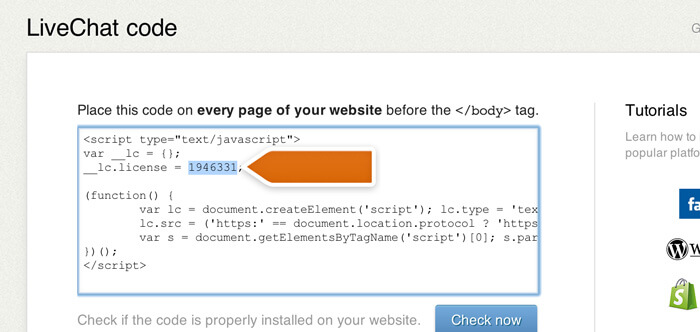
Getting your license number

  1. Type in the license number in LiveChat addon configuration options and select Save changes to finalize.
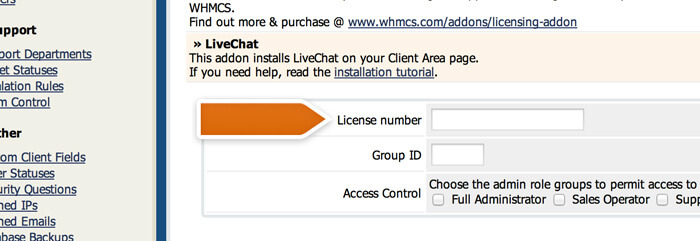
Providing your LiveChat license number

Congratulations! Your website visitors are sure to appreciate the new live chat functionality!
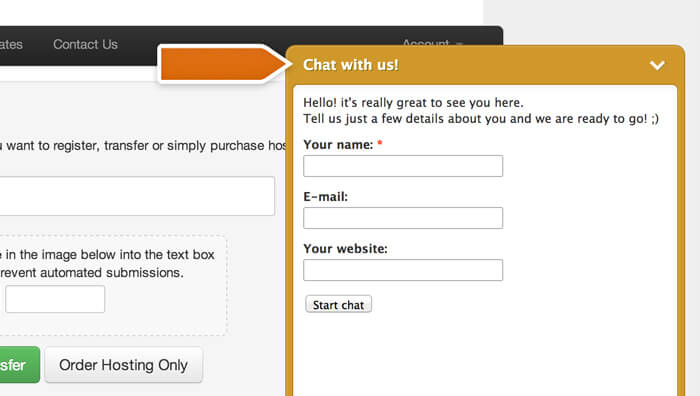
WHMCS - LiveChat integration

Saving chat transcripts as ticketsLink icon

Store chat transcripts as tickets in WHMCS to keep your support communication in one place. Enable this function by following these steps:

  1. Log in to LiveChat and Install the WHMCS integration.
  2. Proceed by clicking Install.
  3. Provide your WHMCS website address, Admin login, and Admin password.
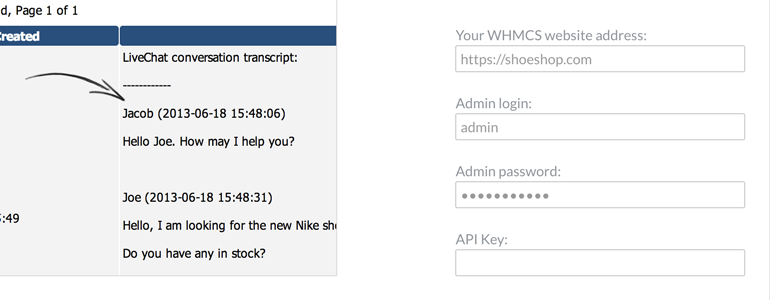
When providing your WHMCS website address, remember to include the https:// or http:// protocol in the URL.

Configuring WHMCS integration

  1. Next, log in to WHMCS and go to Setup, Support and then Support departments.
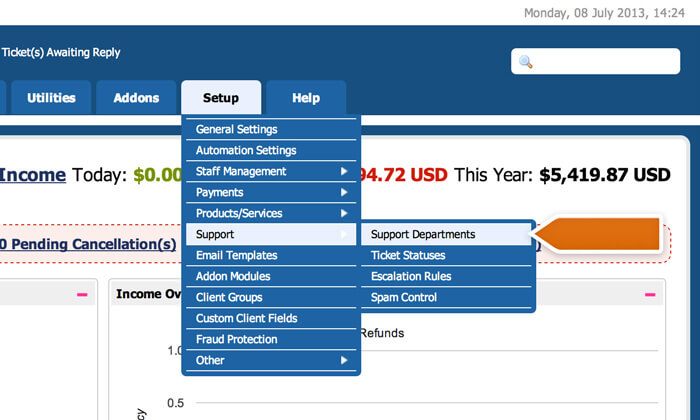
Accessing Support Departments section

  1. Choose an existing department or create a new one by selecting Add new department.

WHMCS selecting a Support Department

  1. Copy the Department ID from the end of the page URL and enter it in the integration options.
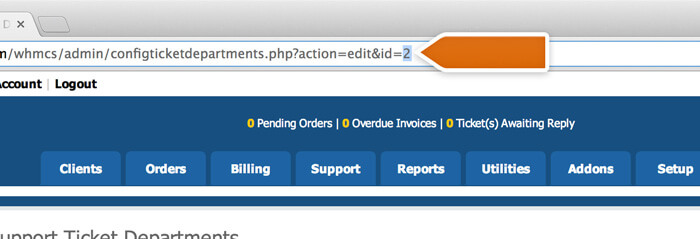
Getting the Support Department ID number

  1. Next, create your unique API key by adding the following line to the configuration.php file (replace the “abc123” value with a random string of words and numbers):
$api_access_key = "abc123";
  1. Enter the newly created API key in WHMCS integration options and click Save changes to finalize.
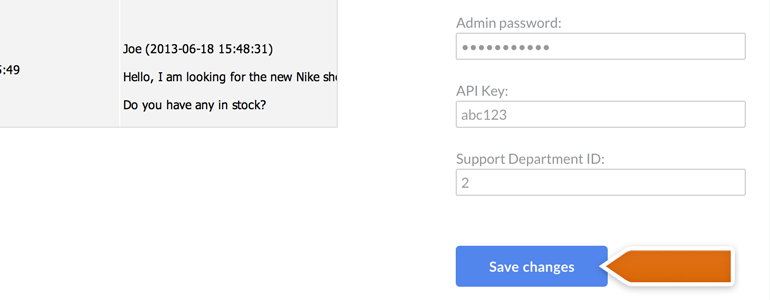
Finalizing integration changes

After enabling this feature, all chat transcripts will be forwarded to your WHMCS as closed tickets.

Please note that if you don’t have the pre-chat survey enabled or if you don’t ask for email during the pre-chat survey, the transcripts won’t be forwarded to your WHMCS as tickets. You can enable the pre-chat survey and add the email field to survey in the Pre-chat survey section.

Was this article helpful?

Got it!

Thanks for your feedback.

Thank you!

We’re happy to help.

RELATED ARTICLES

Zendesk Guide: Add LiveChat to your knowledge base

Place your LiveChat directly on your Zendesk Helpcenter page to see who is on your Zendesk page and answer chats from those visitors.

Read the article

Segment: live chat in your store or app

How to turn on LiveChat - Segment integration? Read more to learn how to integrate LiveChat with Segment!

Read the article

Start using LiveChat now!

Free 14-day trial AI-driven features No credit card required

Still not convinced? Discover all LiveChat features

Discover text| products: