Welcome to the Manager’s Handbook, a helpful guide to implementing LiveChat in your organization.
We’ll cover topics like:
- the absolute basics of LiveChat,
- the Agent App,
- the Chat Widget,
- monitoring performance
- training your team.
This handbook will help managers like yourself add LiveChat to your website and create a workflow that is effective both for your team and your enterprise. It doesn’t matter if you use LiveChat for sales, support, or lead generation.
Learn the basics of LiveChat 
LiveChat consists of two elements: the customer-facing Chat Widget and the Agent App.
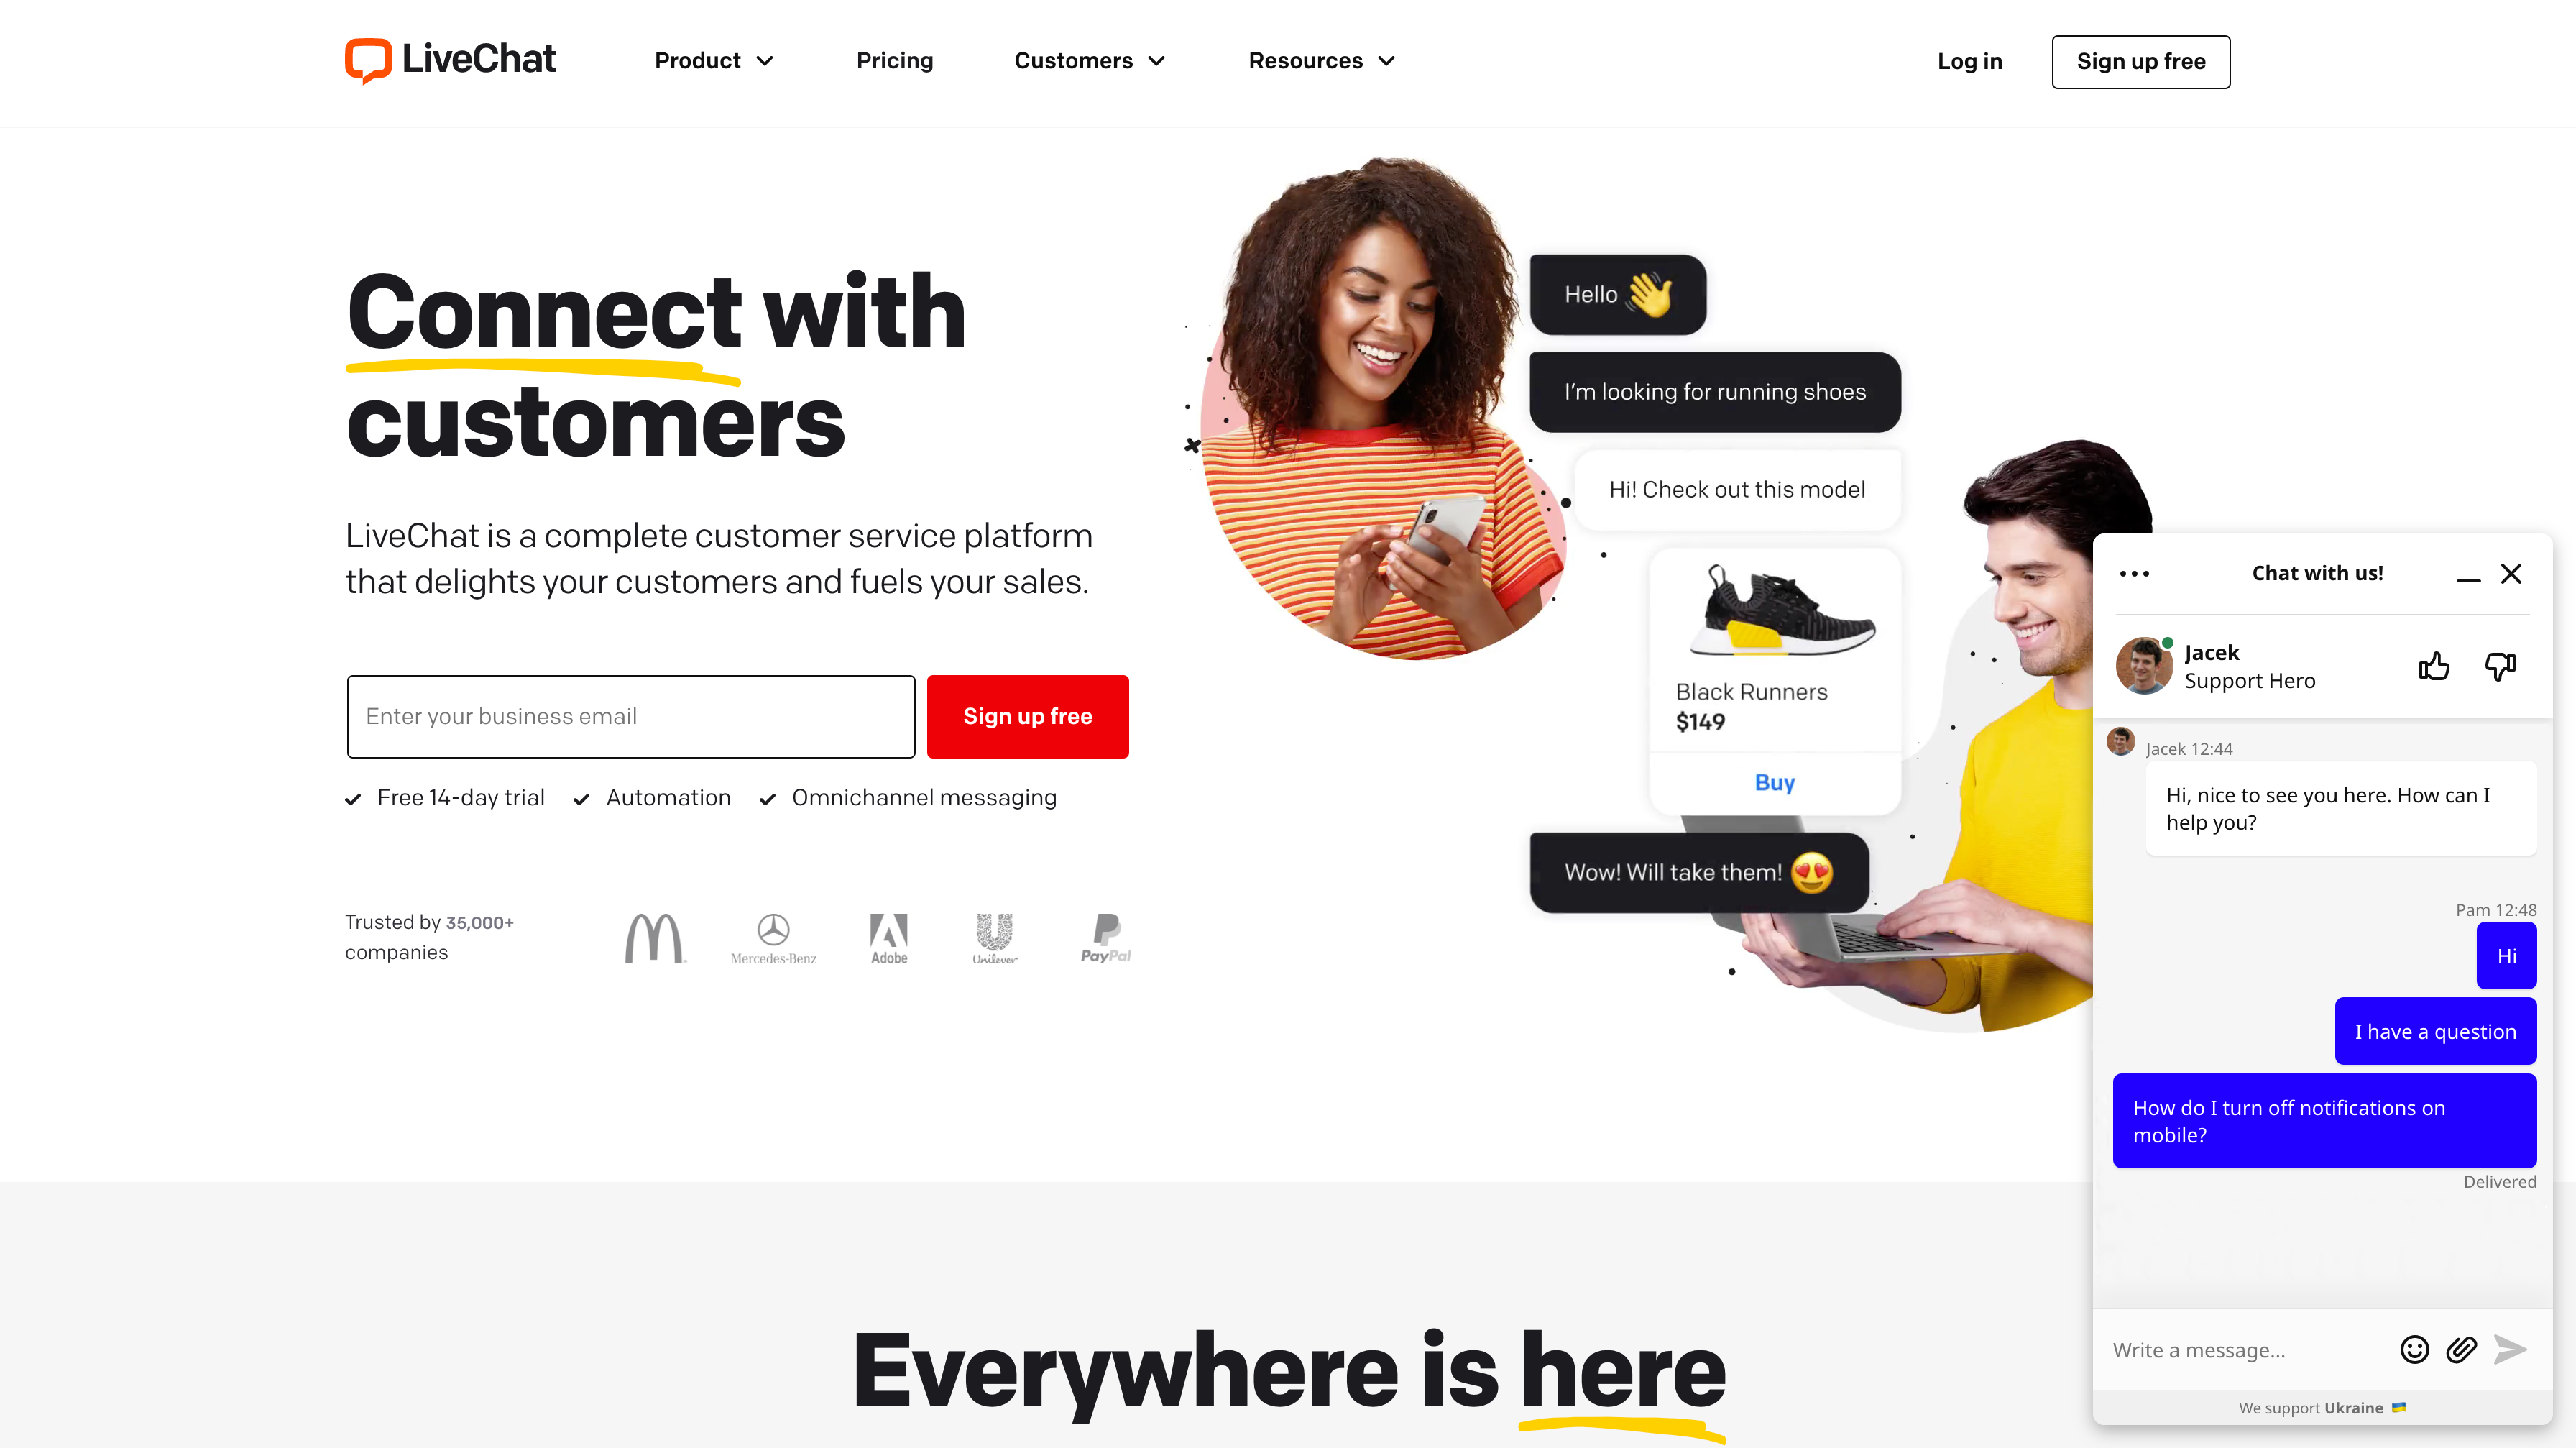
The Chat Widget, sometimes referred to as a chat box or chat window, is what customers see on your website, and where they can start a chat.
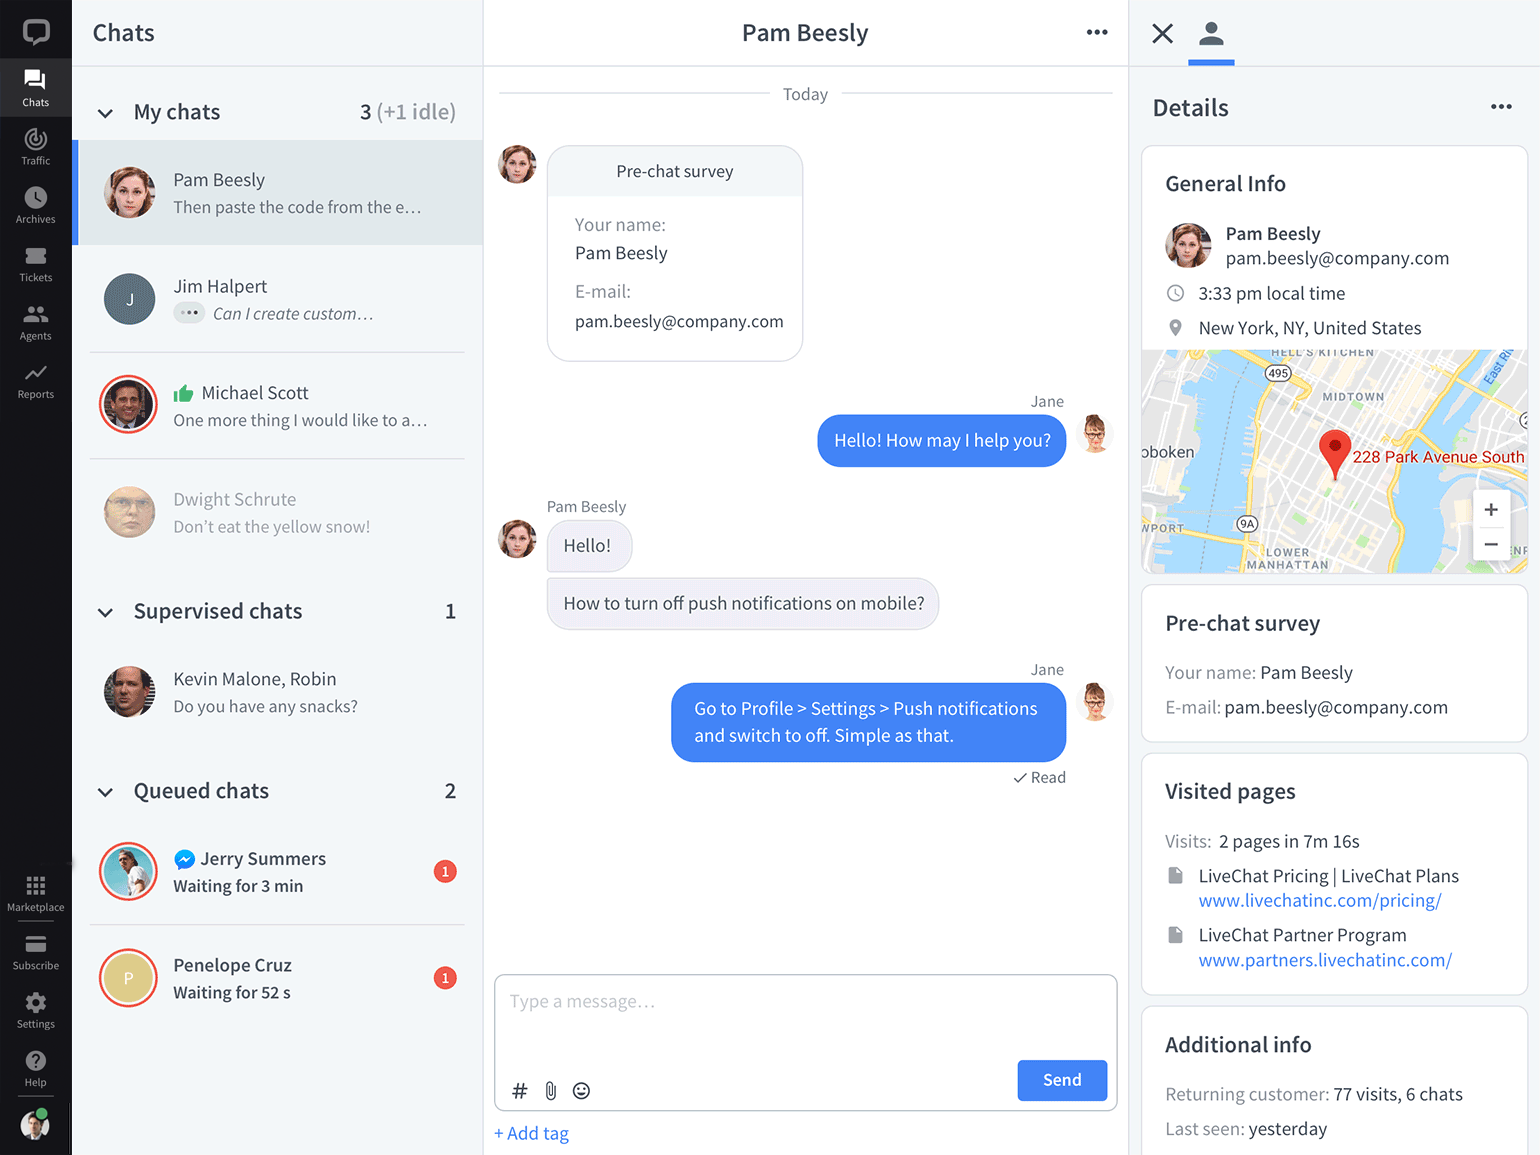
The LiveChat Agent App is where agents can handle customer queries, and you can configure LiveChat and monitor performance.
Sign up and sign in 
Creating an account takes seconds. Provide your email address and select Sign up free. Fill out the form, and that’s it. We give you a free 14-day trial, no credit card required.
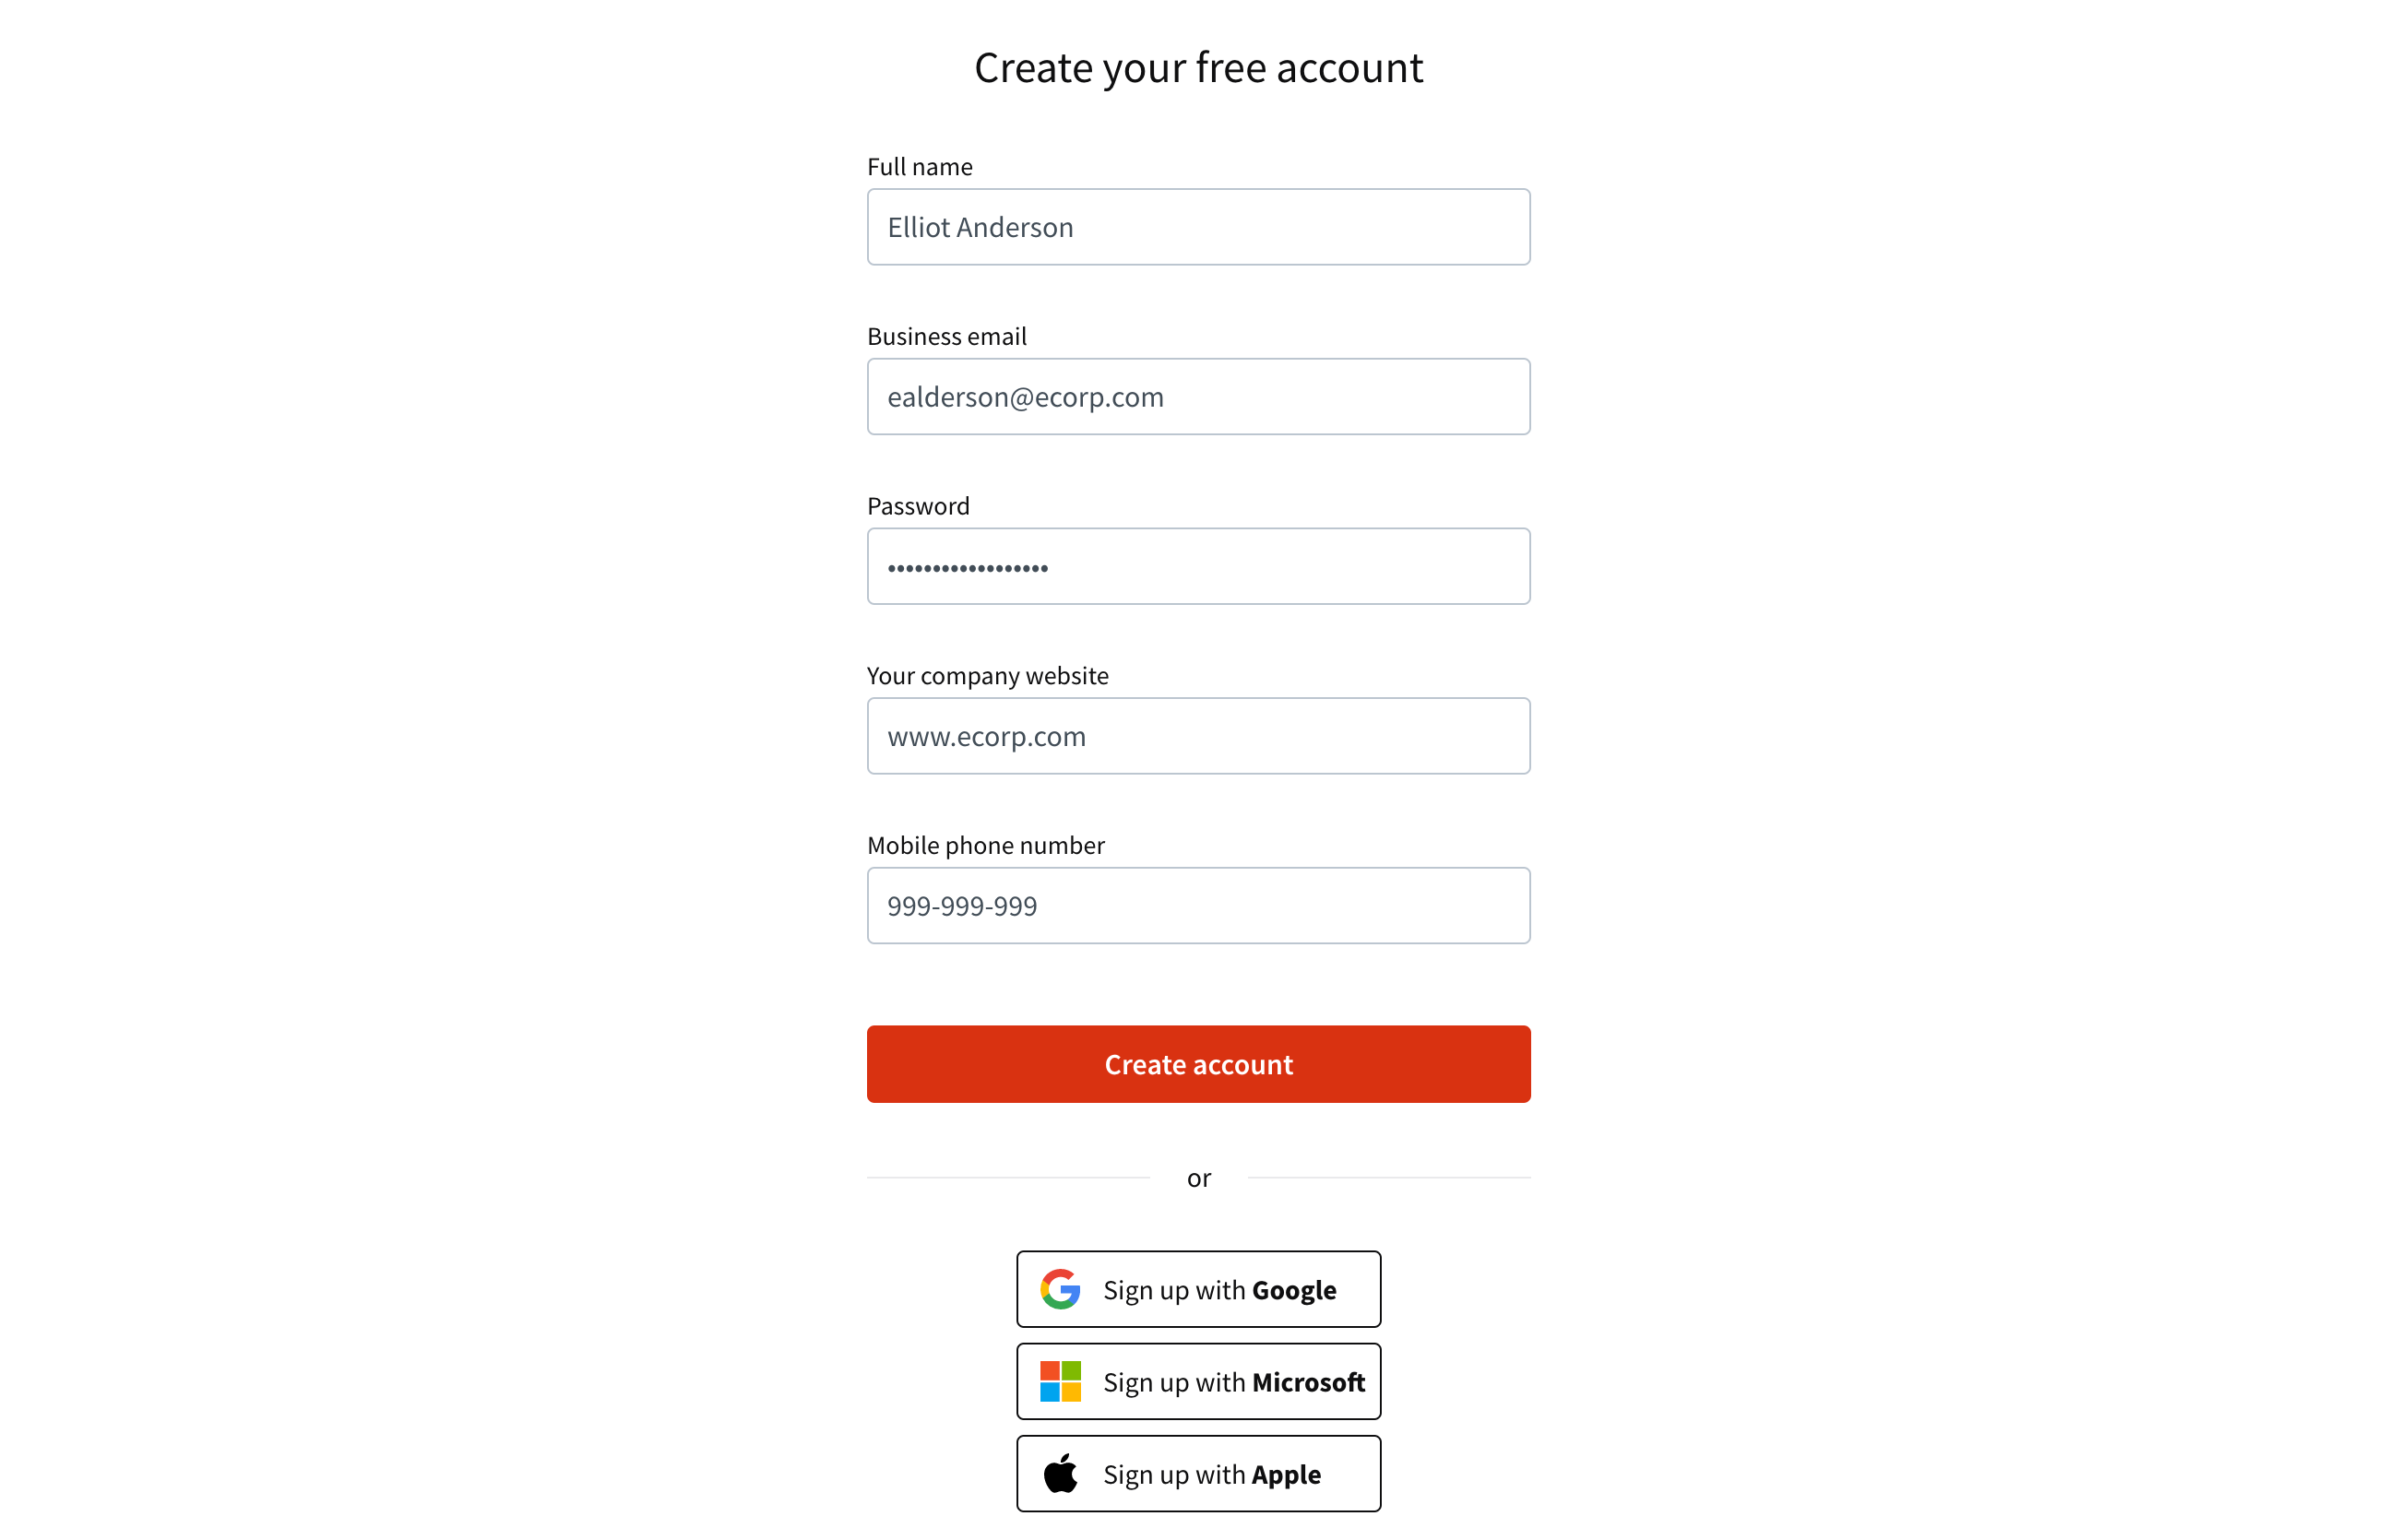
Follow the onboarding steps in the app to have LiveChat up and running in minutes. If you prefer to have a look around first, you can skip the steps and follow them later.
By default, you are on the Business plan and you can add as many agents as you wish. If you want to try out a different plan talk to our support team and they will fix it up for you.
Learn more about the pricing plans.
Log in to LiveChat
When you create an account, you are automatically logged in to the LiveChat Agent App. For everyday use, you can log into LiveChat in your browser, or download the desktop application and log in there.
- Go to the LiveChat login page, or open the desktop app.
- Enter the email and password you used during the account registration.
- Select Sign in.
Download the LiveChat Agent App 
You and your team can use the LiveChat Agent App for web browser, desktop, or mobile iPhone and iPad, Android phone or tablet or Huawei device. If you would like to read about it, we have an article on Agent Apps in our Help Center.
Start your first chat
Once you’re logged in, try it out for yourself. You can start a chat with yourself before adding the Chat Widget to your website. Go to Settings>Channels>Chat page in the LiveChat Agent App, copy the link, and open the Chat page in your browser. You can also scan the QR code and start the chat on your mobile.
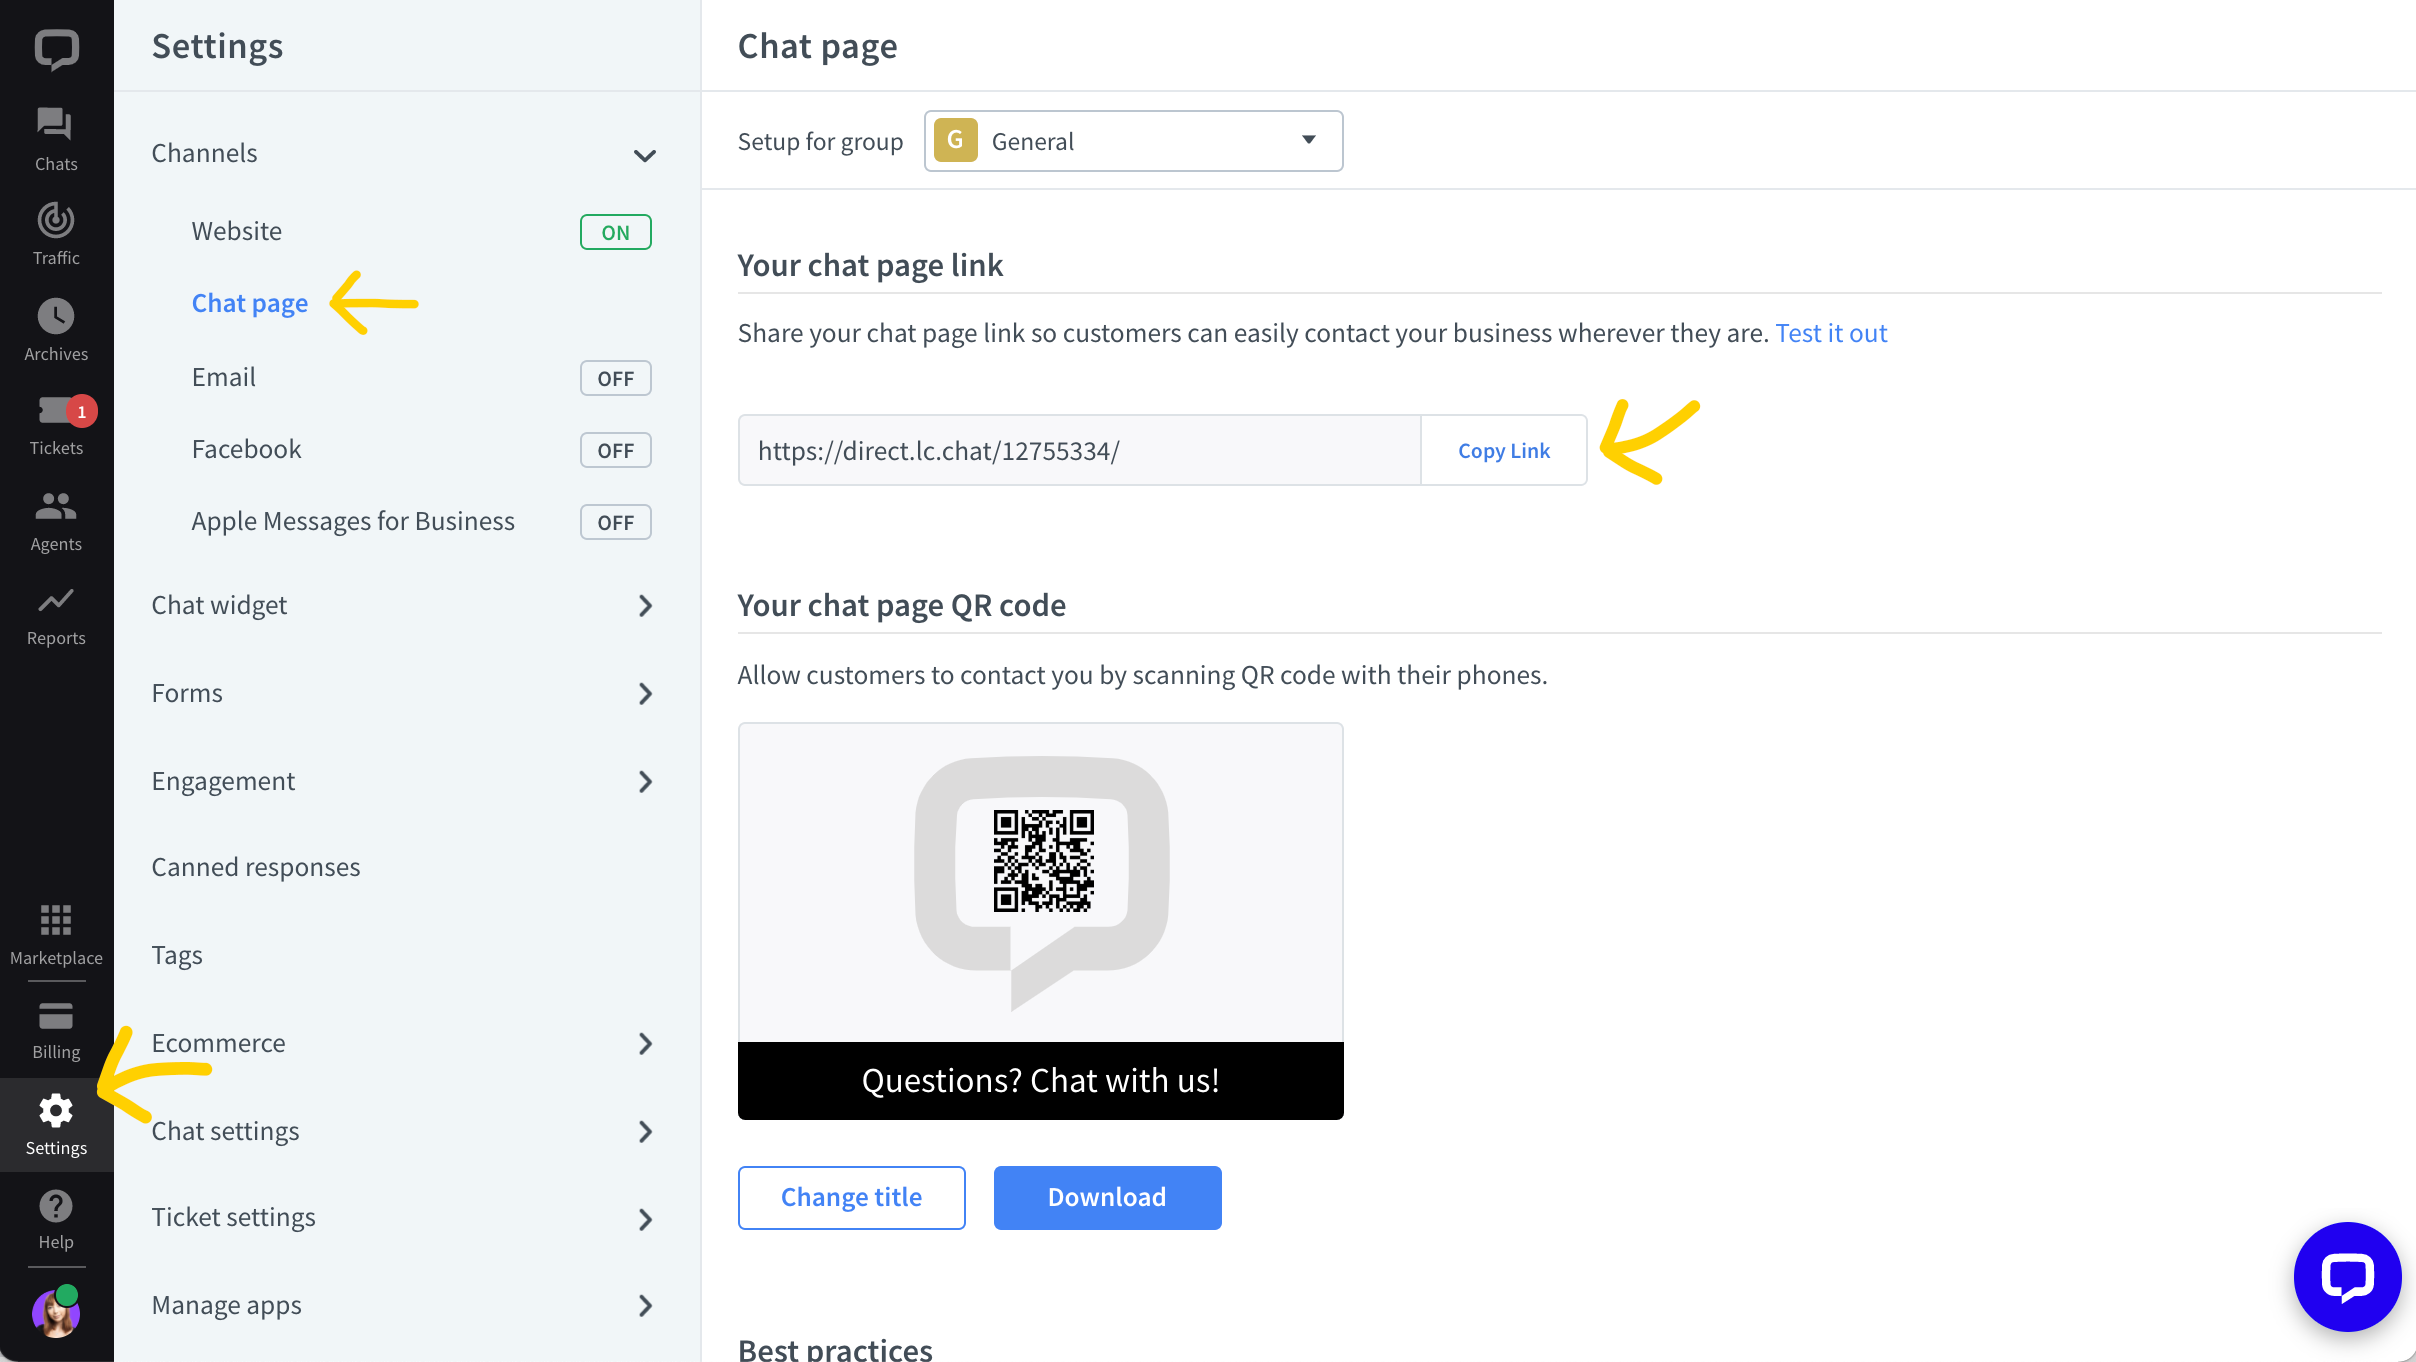
Start a chat, and see it in the LiveChat Agent App. Respond and see how it looks from the customer’s end.
Now that you know how it will look for your customers and your agents, let’s see how to invite your team.
Set up the Agent App
Adding LiveChat to your website is a great way to gain customer trust and loyalty. A key part of customer satisfaction is having a big enough team available for chats. You may already know how many people you need to onboard, but if not, there are ways to figure it out using data from other channels. Once your LiveChat is up and running, the Reports in the LiveChat Agent App will help you better estimate the team size. If it is just you for now, you can skip to setting up your profile.
Bring people on board
The sooner you add your teammates to LiveChat, the better, as it gives them a chance to learn the app with you. It’s also an excellent opportunity to talk to them about why you need online communication software and how it can help them with their work. We have a dedicated Agent’s Handbook just for them.
Invite agents
To add people to your LiveChat team, go to the Team section in the LiveChat Agent App.
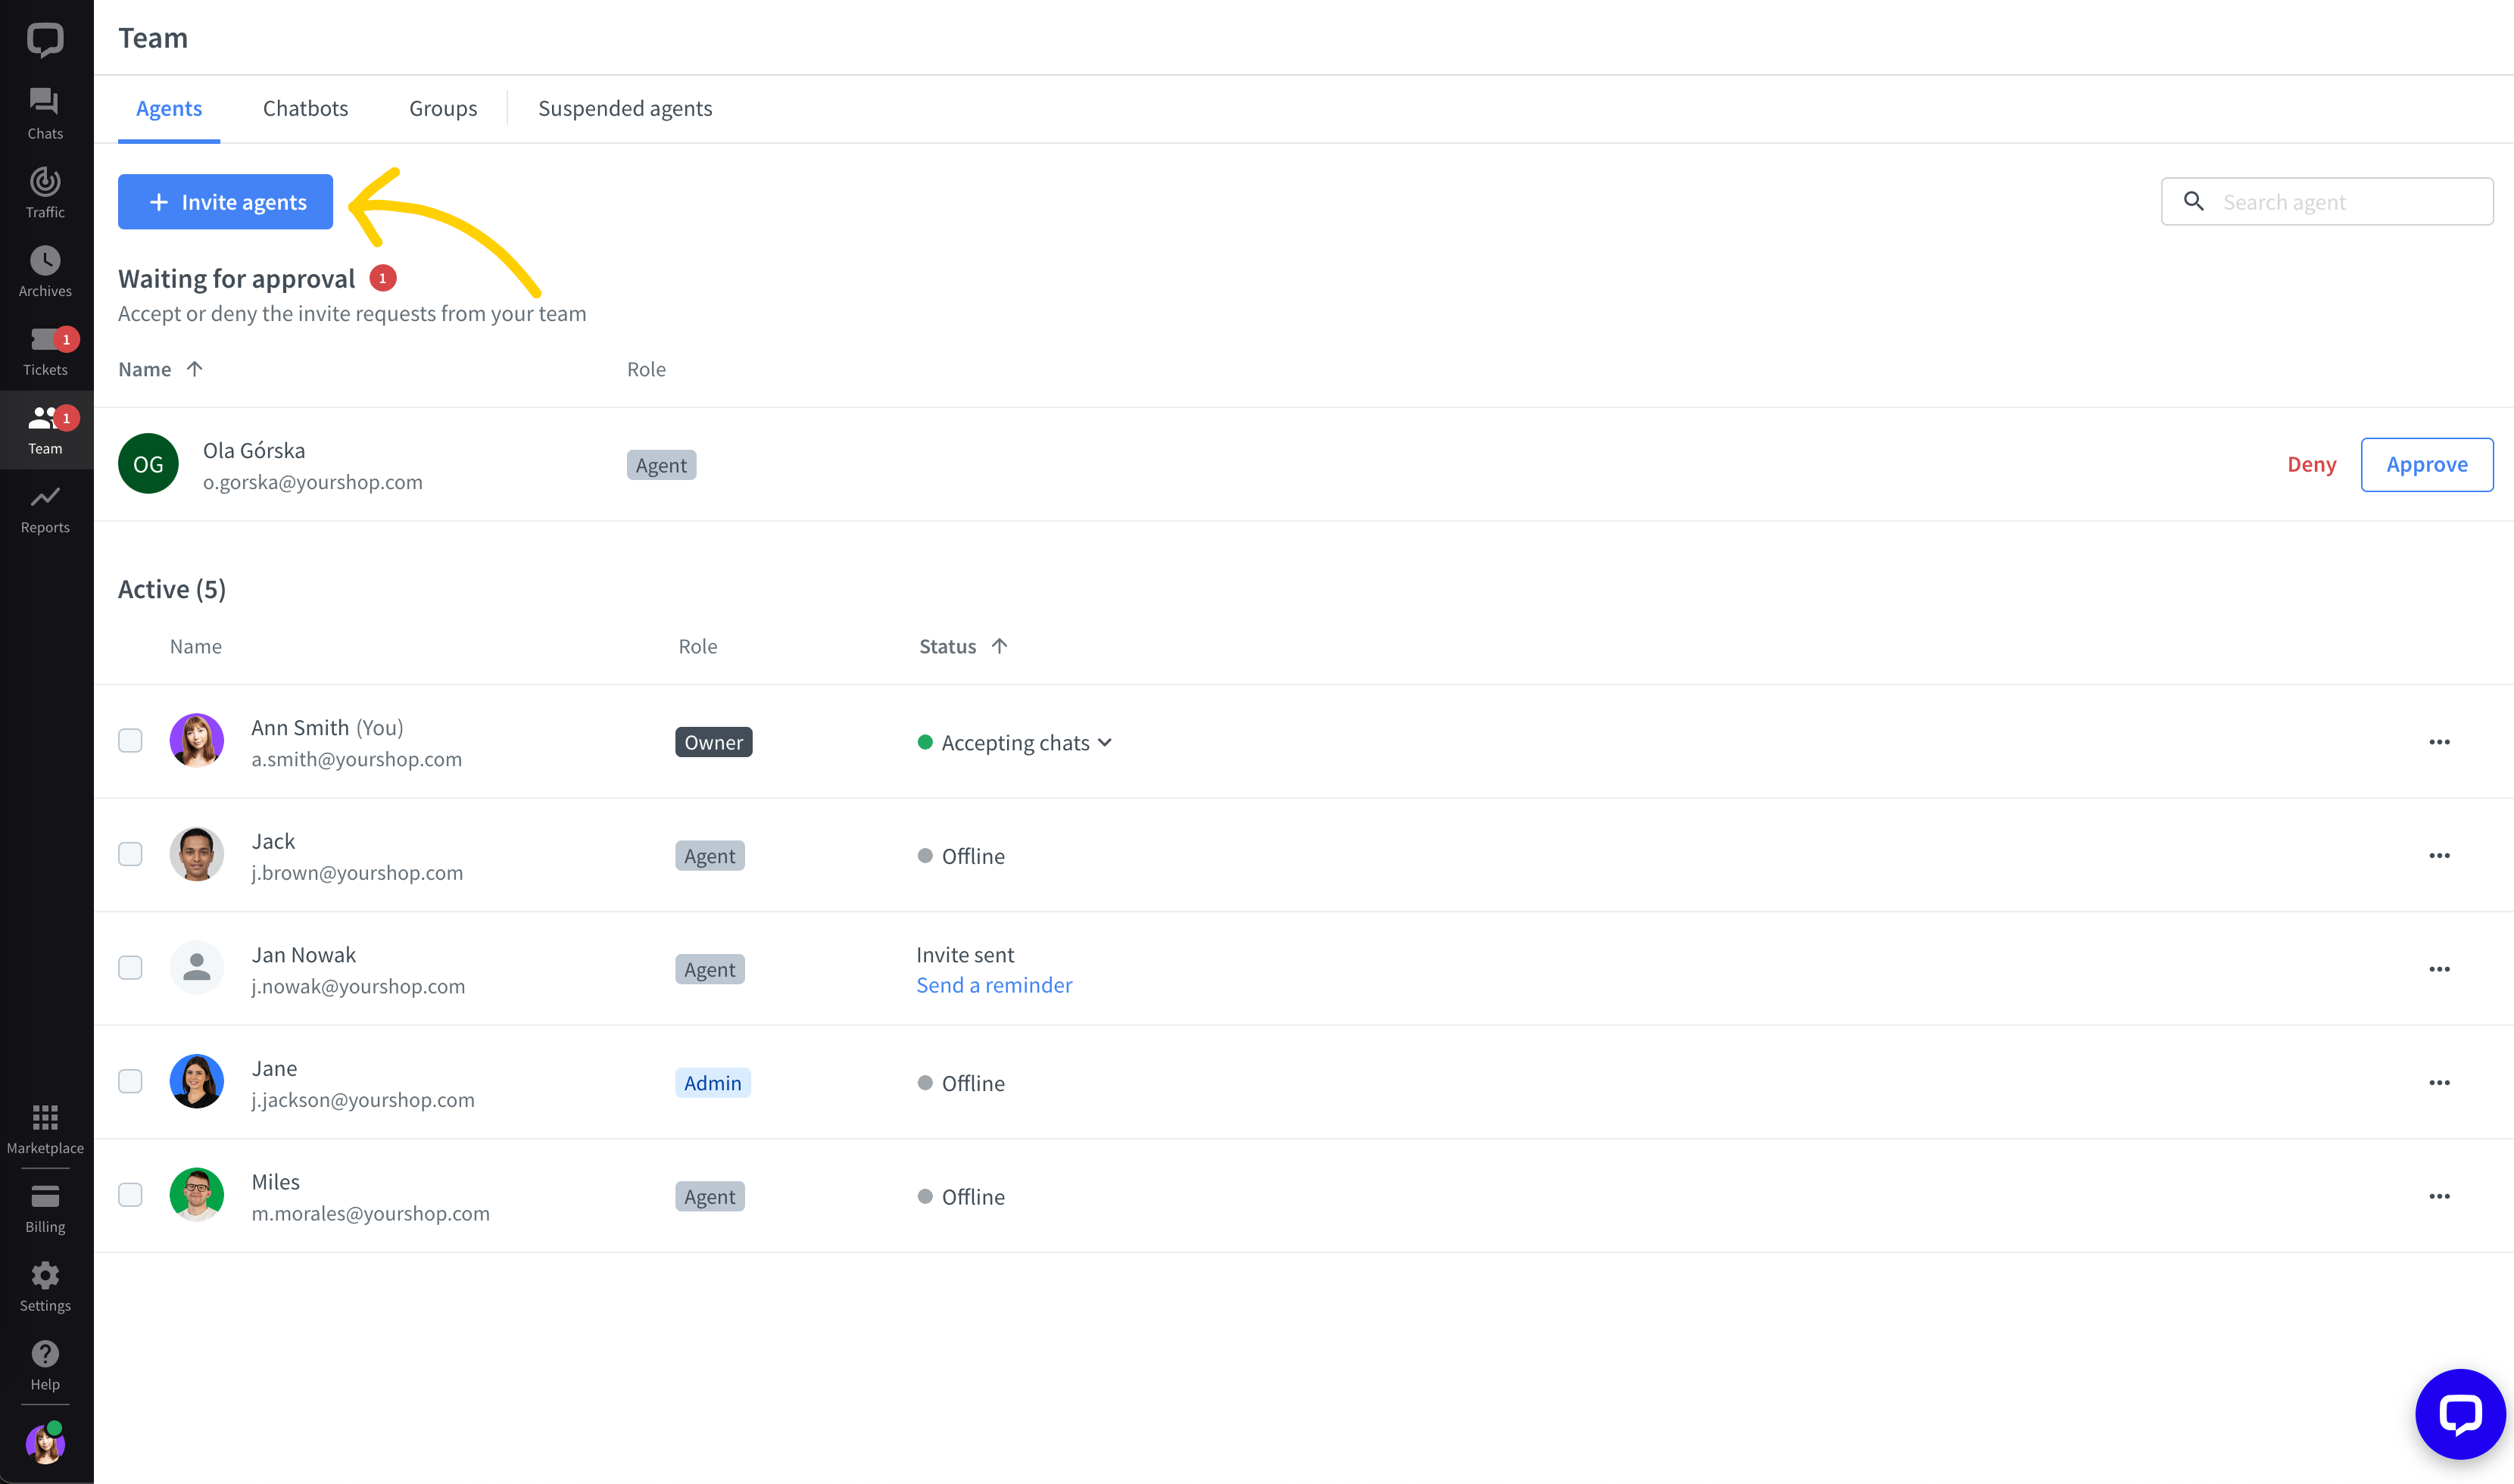
Once there, select +Invite agents. Paste your team’s email adresses and choose roles for them. When you hit Invite, they will receive invitations with instructions on setting up their LiveChat password.
More about roles
When you add new agents, you need to choose what kind of permissions they will have. You are the Owner, so you are in full control of the license. Your teammates can either be Admins or Agents.
- Agents answer chats,and see archives and reports, but can’t change settings.
- Admins have all agent permissions, plus they have access to all settings.
By default Admins can also manage the subscription and invoices. You can change that by editing the Admin’s permissions in their profile.
You can read more about roles in our Help Center.
Edit agent profile
Once you’ve invited your teammates, each one of you can play a bit with your profile settings.
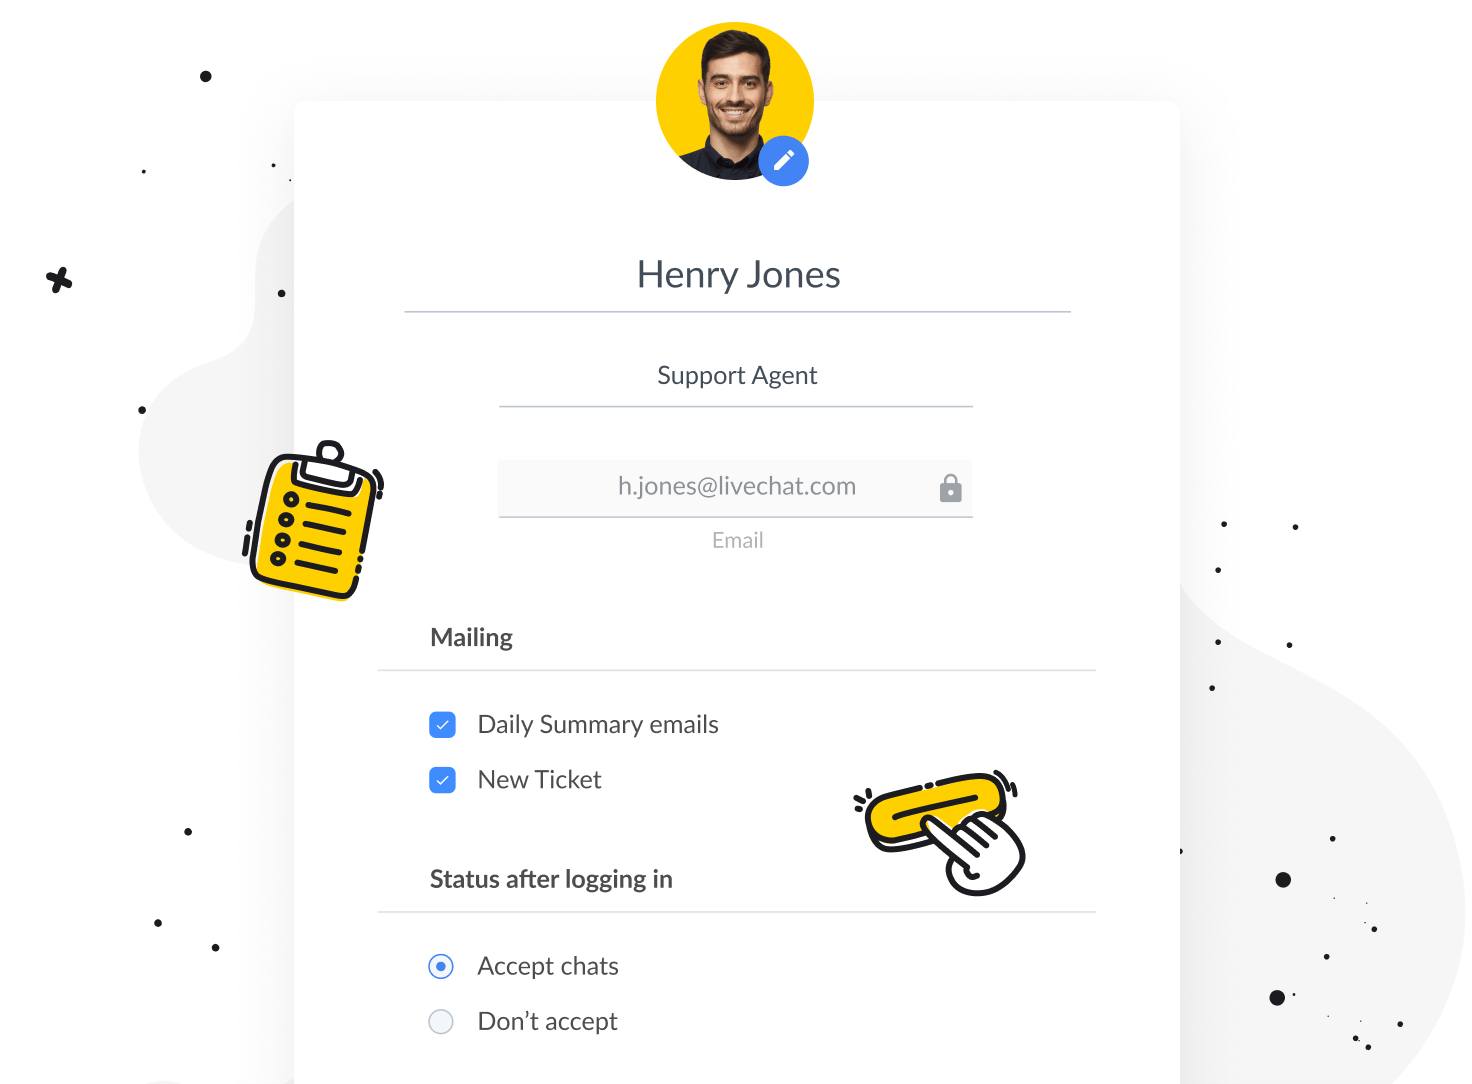
To see and edit a profile, pick a person from your list of agents and either double-click or select Edit from the drop-down menu. Read more about editing agent profiles.
Every team member can add and edit their photo, job title, and Status after logging in: whether they want to accept chats as soon as they log in, or they’d rather turn chats on manually at some point after logging in. Send your team the Agent’s Handbook for detailed instructions.
The Owner and Admins can set up the workflow for the whole team. They decide how many chats each agent should handle at the same time, set up the work scheduler, and assign agents to specific Groups.
As for the concurrent chat limit, our recommendation is three for rookies and six for seasoned agents, but it will depend on the type of chats your team will have. The work scheduler, available in Business and Enterprise plans, will switch your agents to accepting chats at the beginning of their shift, provided they’re logged into the Agent App.
Work scheduler
You can set up specific working hours for each of your agents to ensure each shift is appropriately staffed and there is always someone available to answer your customers’ questions. Read more about the work scheduler in our Help Center.
Groups 
Groups are very useful if you have multiple departments handling different cases, e.g., Sales and Support. They can significantly shorten case resolution time and reduce transfers between agents working in different departments. Read more about Groups in our Help Center.
Take advantage of the Agent’s Handbook
Finally, don’t forget to provide your agents with our Agent’s Handbook, a go-to resource on daily work in the LiveChat Agent App.
Test LiveChat with teammates and friends
If you want to try things out before going live, you can send the Chat page to your coworkers or your friends and family so they can talk to you via chat. You will find your chat page link in Settings>Channels>Chat page.
You can also add the Chat Widget to a test or staging version of your website. More on that in the Chat Widget section but before we move on, check out the tools and features inside the Agent App that will make your everyday work a breeze.
Check out the basic tools and features
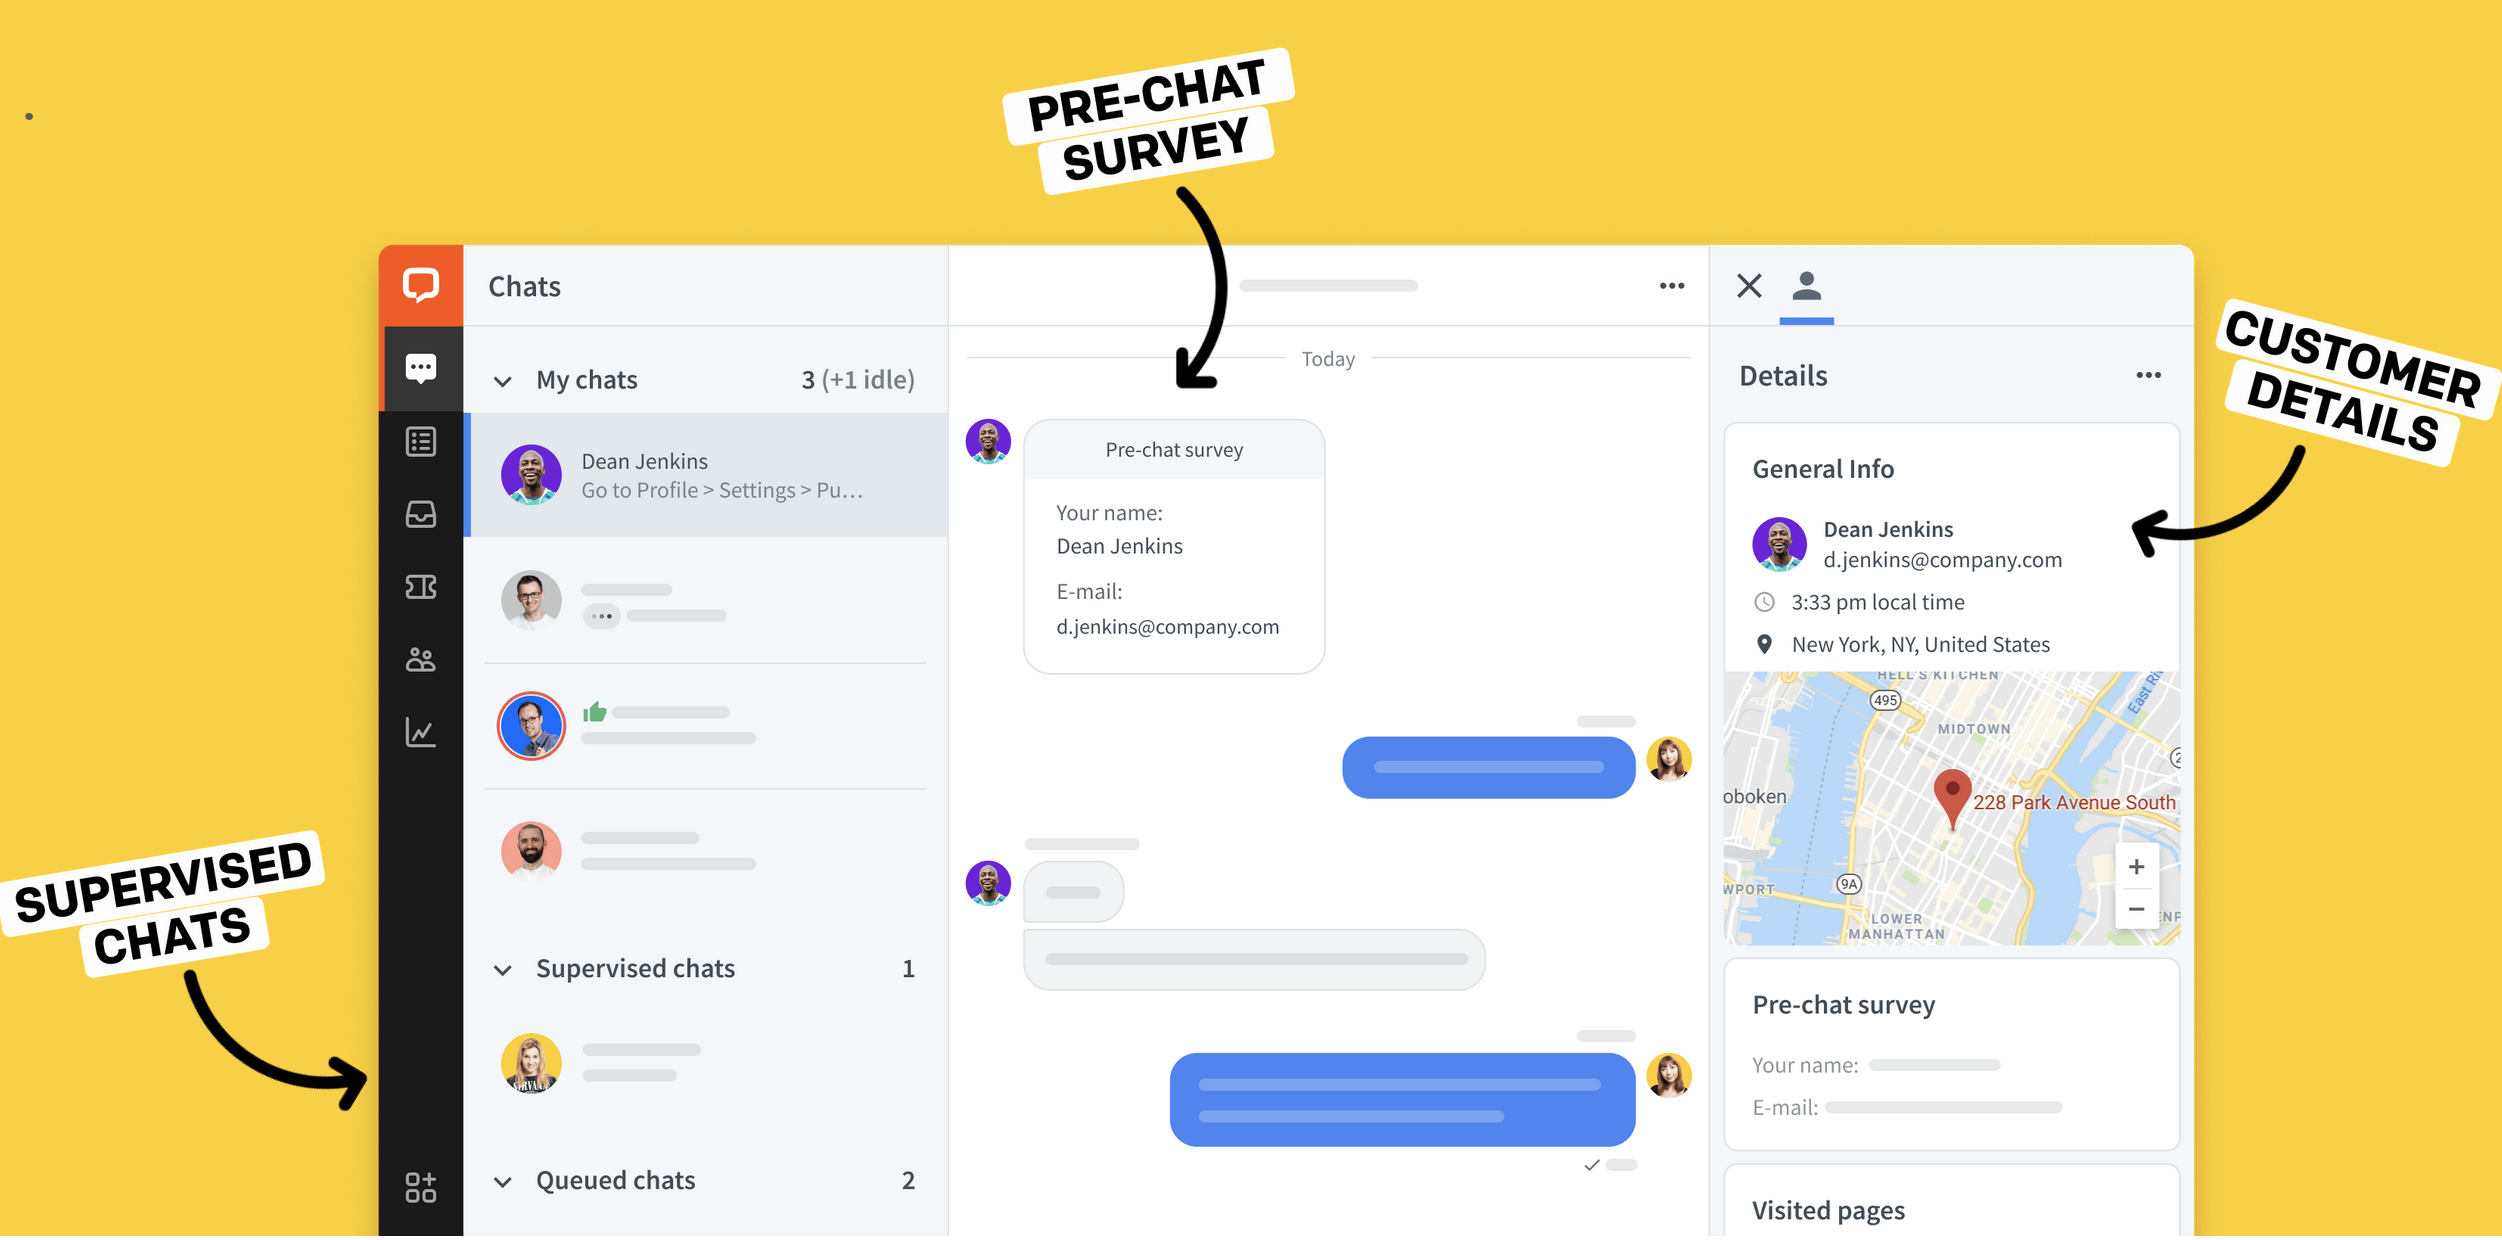
Once you are in the app, you might want to click through the sections to get familiar with the app. There are a few things that you can learn while running test chats with your coworkers or friends
- Agent status — easily switch between accepting and not accepting chats.
- Canned responses — save template messages to quickly send them in chat.
- Sneak peek — see what the customer is typing before they actually send their message.
- Tags — tag each conversation to see trends and patterns, and filter reports later.
- Details — view important information about the customer without leaving the chat.
- Transfers — when you need to, transfer a chat to another agent.
- Supervise — monitor and help other agents during chats.
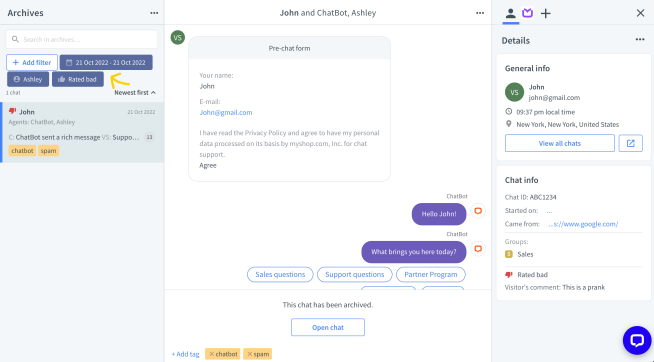
- Archives — easily search past conversations.
Set up the Chat Widget
While you get your team onboarded, set up the customer-facing side of LiveChat software: customize the Chat Widget and add the tracking code to your website.
Customize the Chat Widget
While the Chat Widget is ready to use out of the box, it is also highly customizable. With just a few clicks, you can easily align it with your website branding. You can even preview it live on your web page. See how it works or read more about customizing the Chat Widget on your website in our Help Center.
- Chat Widget — customize the Chat Widget, so it matches your website. All color themes have a contrast score of 4.5 or higher. Read more about Chat Widget accessibility.
- Language and welcome message — change the Chat Widget language and set the first message that will be sent automatically, giving your agents the extra time.
- Availability: decide if the customer can leave a message always or only when agents are online.
- Forms — Enable the pre-chat form to collect leads or the post-chat to let customers rate the chat and leave a comment.
- Targeted messages — set up proactive automatic invitations to chat.
- Routing rules — divide incoming chats by departments, e.g., product pages to sales and FAQ pages to support.
Don’t be afraid to experiment and explore. You can change the settings back and forth as everything is easily reversible (often with just one click) and our support is always happy to help.
Add LiveChat to your website
Adding the LiveChat JavaScript code snippet to the source code of your website not only places the Chat Widget on your WWW sites but also lets you view your online visitors in the Agent Application, track their movement, and provide helpful details and intelligence to agents during chats.
Add the tracking code manually
If your website is custom-built by a developer, you will need to add the LiveChat JS code snippet to the source code of your website. If you are tech-savvy you can do it on your own. Otherwise, ask a developer to do it for you. Here’s how to add the LiveChat code to your website. You can copy and send the code from the Agent App.
For the most tech-savvy, we have an open API, so you can integrate the Chat Widget into your mobile app. Check out the LiveChat Software Platform Docs.
Add LiveChat to your website with integrations
LiveChat integrates easily with almost a hundred CMSs and e-commerce platforms. If your website is created with Wordpress, Shopify, BigCommerce, for example, all you need to do is either copy and paste the code snippet or install a plugin. It takes just a few minutes and requires no technical skills. See the list of step-by-step tutorials.
Once you finish the installation, head to your website and check how it looks. It will feel pretty good after the work you’ve already done. Remember: once it’s installed on your website you can start getting chats right away.
Looking for help with the setup? Our recommended partners will tailor the perfect digital communication solution to your business needs.
Get to chatting
To really see the value of LiveChat, you just need to start chatting. It may be that the visitors on your website will jump at the opportunity to get in touch, but if they don’t, there are ways to make good use of your online time. By increasing the visibility of the chat widget on your website and meeting your customers where they are, you can get those numbers up.
Make the chat widget impossible to miss
Grab your visitors’ attention while increasing user response with an eye-catcher that is easily customizable, retina-ready, and responsive. You can make use of targeted messages.
Stay available after hours
Let customers leave a message after your team’s working hours.
Connect LiveChat with social media
And handle your Facebook messages and Instagram DMs inside the LiveChat Agent App.
Integrate with messaging apps
Connect LiveChat with Apple Messages for Business, WhatsApp Business and more, and handle all your communication within the Agent Application.
Use the language of your customers
Use Message Translator or Sign Language interpreter to connect with all your customers
Be proactive
Apart from welcoming the visitors to your store, use automatic greetings for lead generation, targeted marketing, guiding customers around your website, scheduling appointments, and more.
Check out our Help Center for more tips and trick on increasing chat volume, and the best integrations for increasing engagement.
Chat quality
It may be that the moment you make LiveChat available on your website the chats start pouring in. In such a case, it is vital to make sure customers and prospects are starting these chats, in other words, that these chats bring value. For example, you can set up a pre-chat form to make sure every person who starts a chat actually needs to get in touch with your company.
Get rid of spam and low-quality chats
There are many ways to tackle confused or abusive customers. If too many chats seem like spam, you can use LiveChat canned responses that describe what your company is. Often visitors are just confused and once you explain they will apologize and leave. If they keep sending irrelevant or offensive messages — you can ban them so they can’t bother your team anymore.
You can also stop the Chat Widget from showing for customers coming from locations where your services are not available. You may want to which pages bring the highest number of low-quality chats and delay greetings or remove the chat widget from these particular pages.
Read about dealing with confused and abusive visitors.
LiveChat after work hours
Remember to switch your status to not accepting chats. Decide what you’d like to happen when your whole team is offline. If you’d like customers to still be able to leave a message, switch your LiveChat availability to Always. Read more about 24/7 customer service.
You can also help the customers help themselves by integrating LiveChat with KnowledgeBase, our native integration, and making your knowledge base available in the Chat Widget.
Choose a plan and subscribe
As your trial draws to a close and you’ve had real chats with customers, you already know that LiveChat is right for you. Set up your subscription to let LiveChat help you create the best customer experience. Thank you for choosing us!
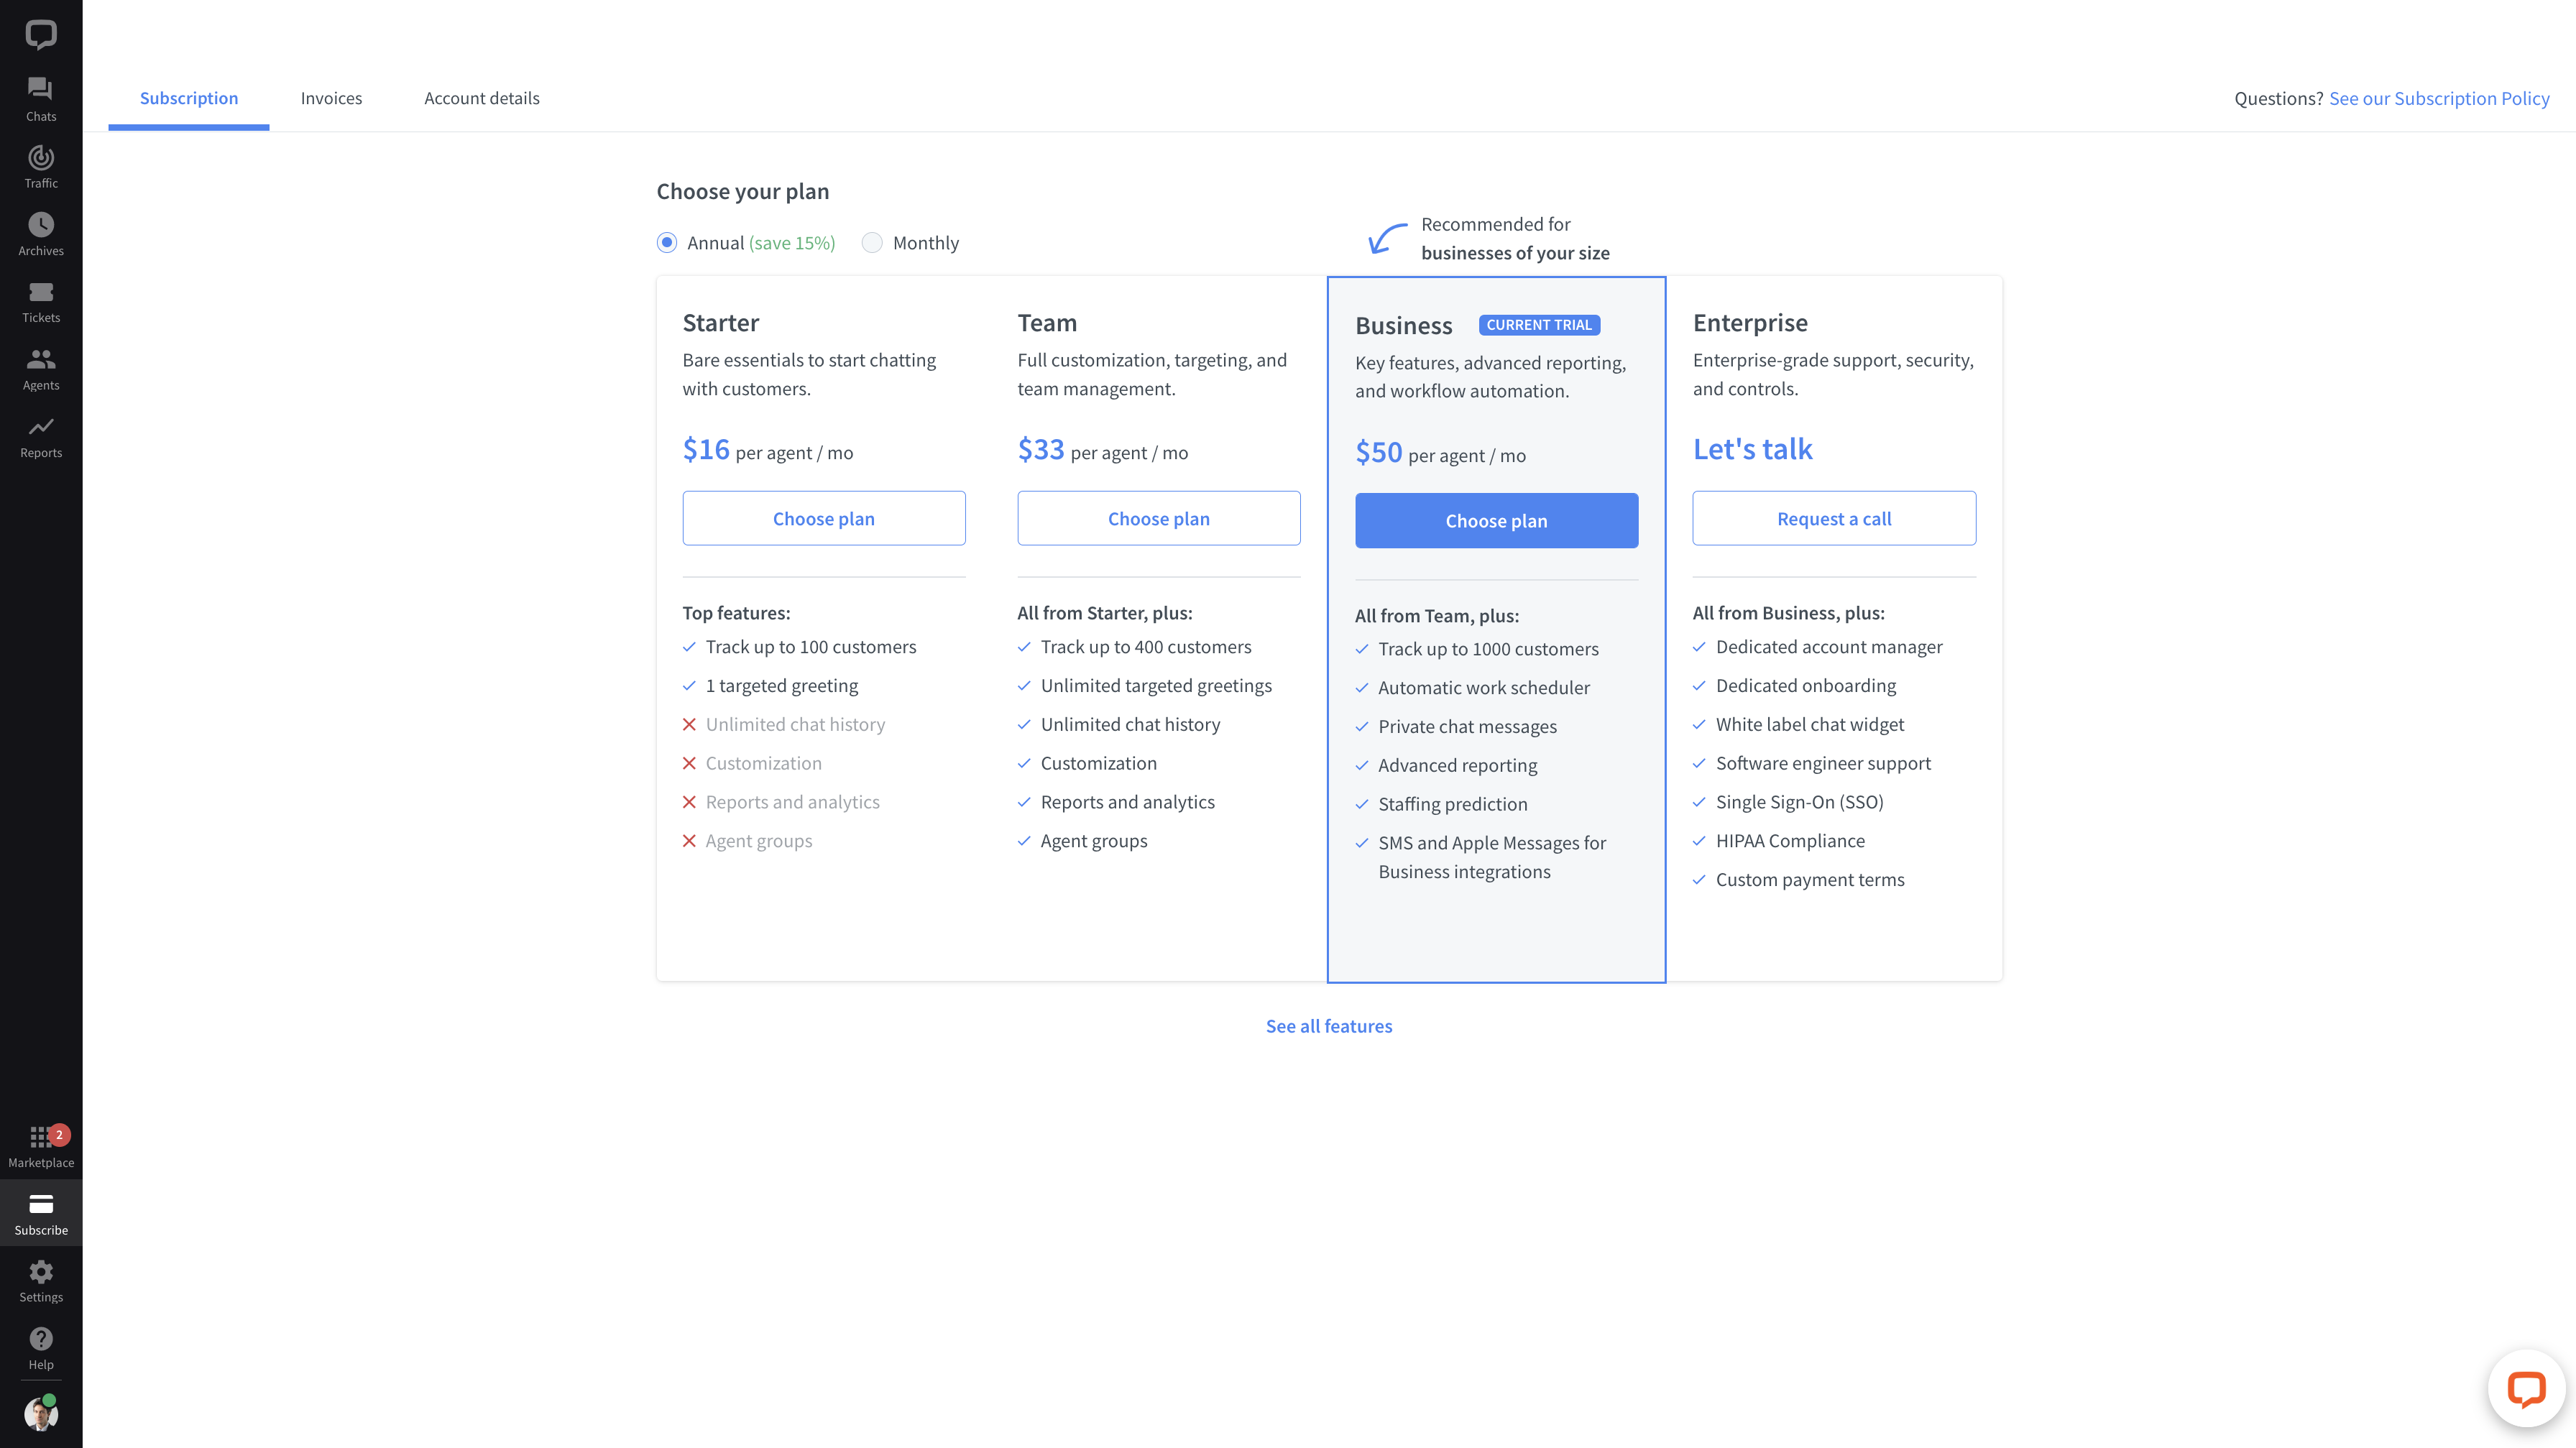
Subscribing is easy. Go to the Billing section and choose a plan, the number of agents, and if you want to be billed monthly or annually. You will also have to provide your company credit card details.
Once you subscribe, all your invoices will be available to download in this section.
Not sure what plan to choose? Here’s an article on choosing the right plan.
Analyze and improve performance
It’s important to decide what you want to get out of LiveChat early on. This will help you track the appropriate performance metrics.It will also influence which features you’ll use, and how.
If you are using LiveChat for support, your primary goal will be increased customer satisfaction. You can take advantage of canned responses and sneak peek to reduce response times, for example. Keep track of the most important metrics using the chat satisfaction and average response time reports.
If you’re using LiveChat for sales, your main goals will be increased conversion and reduced cart abandonment rates. Tag each conversation to follow trends, and use target messages to nudge customers who are stalling on product and cart pages. Filter reports data by tags to see conversations ending with a purchase or view the tracked sales report to see how much money LiveChat is bringing to your online business.
If you are using LiveChat for lead generation, then you probably want to get valuable leads (a lot of them). Use the pre-chat survey to get the information you need before the visitor starts a chat, and use automatic greetings on pages that bring the most valuable traffic. Send info about leads to your CRM with one click, thanks to our integrations with the most popular CRM software like Hubspot, Pipedrive or Salesforce.
Dive into Reports
After a few full days of chats, take a look at the Reports in the Agent App , as the Reports will show you patterns that can help you fine-tune your digital tools. Reports are interactive data points that over time will show you how LiveChat performs for your business and help you optimize the work of your team.
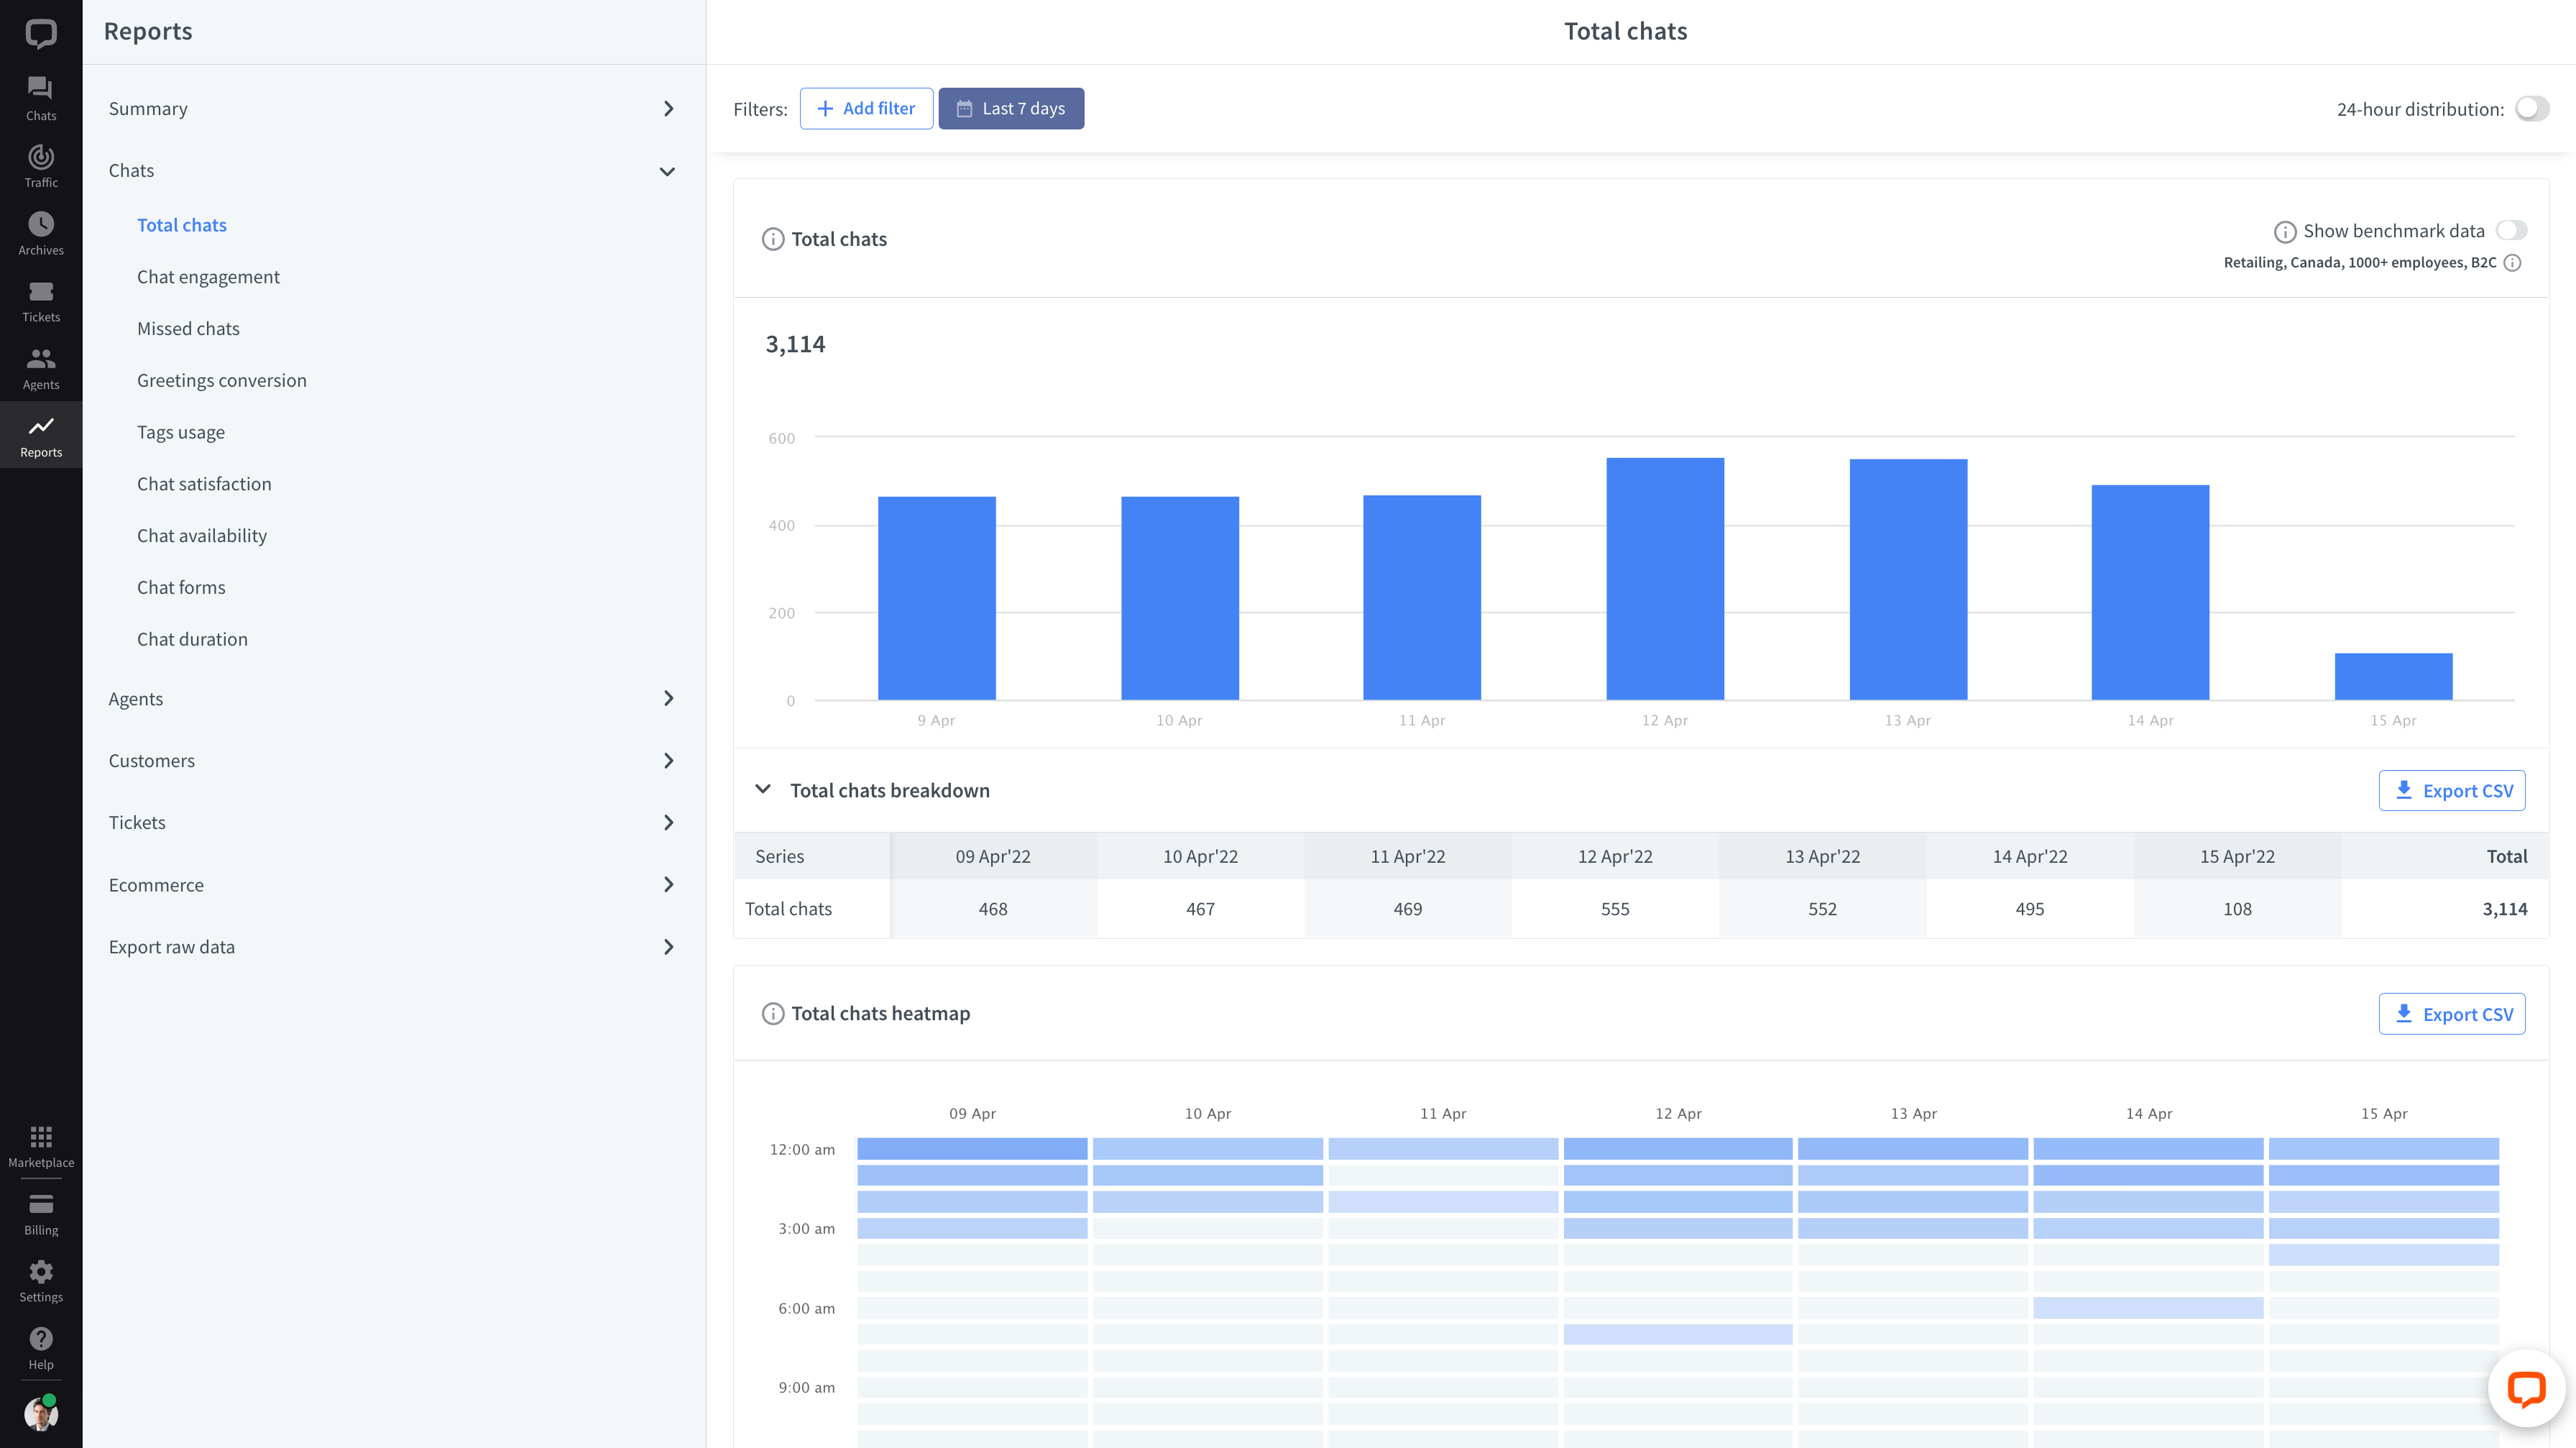
The heartbeat of your customer service is the Total chats report. You will not only see the total number of chats your team had in any given period, over time, you will be able to see trends, ebbs and flows connected with product releases, promo campaigns, holiday seasons, etc.
The Greeting conversion report will show you how many customers saw the automatic invitations you set up against the number of chats you had from them. Additionally, the Greetings breakdown will give you the conversion rate of every particular greeting, letting you optimize your automatic invitations based on real data.
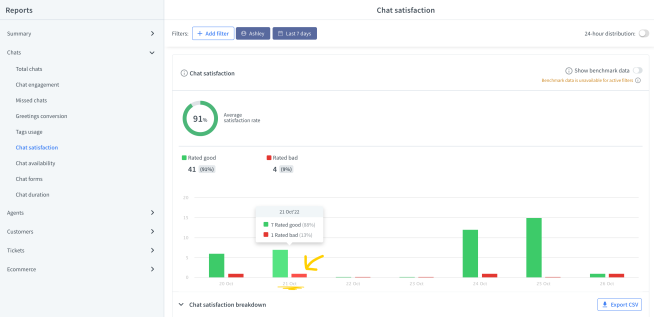
The key to a great customer experience is prompt and friendly customer service. You can see how your team is doing on this front by checking Chat satisfaction and Chat response times.
Ecommerce reports let you track all the chats that fulfilled a set condition that’s strategic to your business. So, if you set up [Goals, you’ll be able to track, and view in the Archives, the chats that were successful in leading the customer to where you needed them to be. If you set up the Sales tracker, the tracked sales report will show you how many chats led to sales, and see in the Archives what value they brought.
If you enable pre-chat and post-chat forms you’ll be able to see the stats on information left by the customers in the Chat forms report.
Reports can be filtered by date, tags, groups or even individual agents, making them an adjustable tool for checking the health of your customer service.
